RSS
Showing posts with label Appetizer. Show all posts

Tuesday, March 4, 2014

Jalapeno Popper Wontons


Happy Mardi Gras and "Fat Tuesday" everyone.  I guess that means it's time to overindulge and then of course, give it all up tomorrow!!!

I like to tell myself that one of these days, I'll go to New Orleans and partake in the festivities.  I've been there once before and had a good time; it just wasn't during Mardi Gras.  I think it'd definitely be fun though, which leads me to today's funny story, or at least it's funny now, but maybe not at the time.....

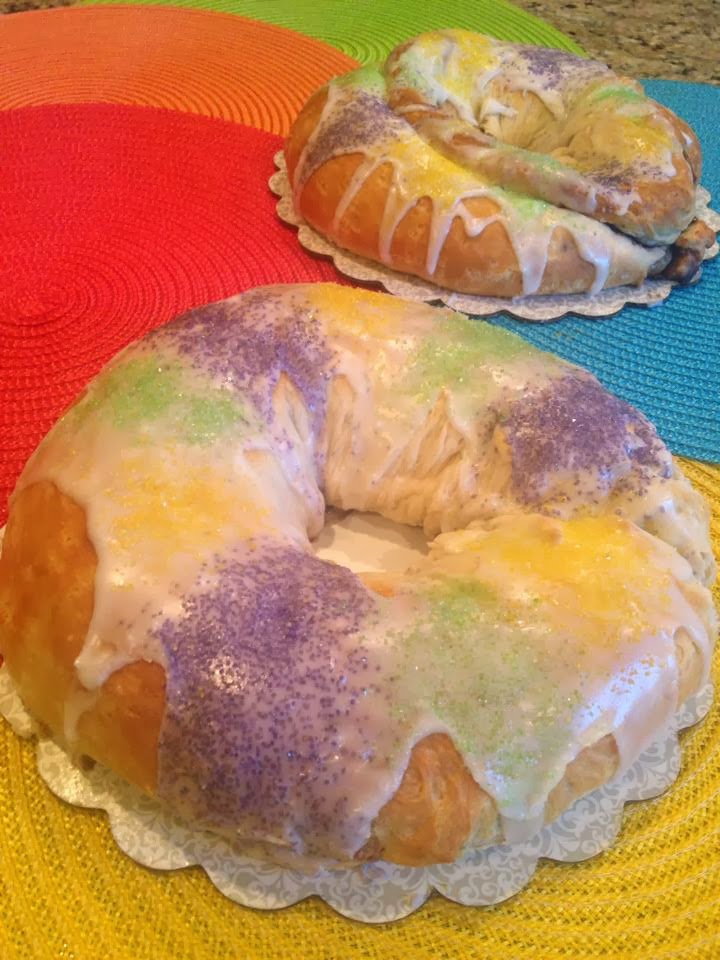
With it being Mardi Gras, I attempted to make my first traditional 'King Cake', for a party, and believe me when I say that it did not go well.  I usually consider myself a pretty good cook/baker, but for some reason, I  just could not get the pastry dough to rise.  I originally made one cake on Saturday night, but was not satisfied because it did not turn out the way I wanted (it seemed doughy).  Therefore, I tried making 2 more batches on Sunday morning, and neither one of those rose.  I was definitely getting frustrated (poor Jeff), and about to make a 3rd attempt when I figured I should get some new yeast.  Jeff was nice enough to run to the store for me, and then I tried again.  Long story short, I attempted to make a total of 8 King Cakes, and still was not 100% satisfied with the final result.  I've determined that anyone who can make them look pretty is amazing to me.  I apparently am not meant to live in New Orleans and definitely am not meant to make these on a regular basis or ever again.


That's enough of my kitchen failures though, so let's move on to my successes......

With it being "Fat Tuesday" and all, I decided the other night that I wanted to cook something for Jeff using a method I typically avoid, which is deep frying.  So what did I deep fry?  Jalapeno popper wontons to be exact.  This dish is traditionally meant to be more of an appetizer, but seeing that I wasn't going to be having any, it was more than enough for Jeff to eat as a main meal.  In fact, he actually had leftovers to take for lunch.  Mostly because this recipe yields about 30-40 wontons; which he added, were absolutely delicious!

Enjoy!

Jalapeno Popper Wontons

Ingredients:
Wonton wrappers
1 (8 oz.) package of cream cheese (I always use 1/3rd less fat)
3 jalapenos, minced (seeds removed)
2/3 cup shredded cheddar cheese
Dash of garlic powder (not too much) - optional
Dash of cayenne pepper - optional
Vegetable oil, for frying
Sea Salt, for garnish

Directions:
In a small to medium bowl and using a hand held mixer, beat the cream cheese until smooth in texture.  Add in the jalapenos and cheddar cheese (plus garlic powder and cayenne pepper; if you desire) and mix on a low speed until just incorporated.

Lay out a few wonton wrappers at a time, and add about a teaspoon of filling onto the center of each wrapper.  Using your fingers, fold the wrappers over, to form a triangle and smear a little water around the edges to seal the two sides together.

Heat the vegetable oil over a medium heat, until it reaches around 350 degrees.  Fry the wontons in small batches until they turn a nice golden brown.  You may need to flip them over while in the oil, just be careful as you do so.  Remove the wontons with a slotted spoon and place on a plate lined with paper towel to remove the excess oil.  Garnish with the sea salt while they are still hot.


Once they have slightly cooled, serve and enjoy!

Source: Slightly adapted from Taste and Tell

Sunday, February 2, 2014

Beer Cheese Dip


Super Bowl Sunday is officially here, and it's never too late to run out and get some last minute ingredients for those tasty party snacks.  For those of you having people over, I know exactly how it goes, because this is the first Super Bowl in the past few years, that we've not thrown a party.  To be honest, I'm kind of excited about it, although I also find it to be bittersweet.  I really do enjoy having friends over because it's always a good time, but with being out of town this week, and then coming home to make a cake, I'm pretty beat and am actually looking forward to a quiet and relaxing Sunday.

However, if I were hosting a party, I'd definitely be making this addicting and delicious beer cheese dip.  Not only is it a quick and easy recipe to follow, but it's also flavorful and is guaranteed to be a hit.  This dip went very quickly when I originally made it back in December (for our ugly sweater Christmas party) and I even ended up passing out the recipe to a few friends.

It goes great with mini pretzels, but you could also dip chips in it as well, or spread it on crackers.

Beer Cheese Dip
Printer-Friendly Version

Ingredients:
ngredients:ndly Version
4-8 oz. packages cream cheese, softened (I used 1/3 less fat and it was still delicious)
2/3 cup beer (I used Yuengling)
2 envelopes Hidden Valley Original Ranch packets
4 cups shredded cheddar cheese

To Dip:
Pretzels
Crackers
Chips

Directions:
In a large bowl, beat together the cream cheese, beer, and ranch packets until smooth and creamy in appearance.

After that, stir in the cheese.  I turned the hand held mixer to a lower speed and combined it that way.


You could serve the dip right away, but its best if you cover the bowl and refrigerate for at least 1-2 hours.  That way the flavors have time to combine.  You could also make this dip a day or so ahead of time.


Monday, January 13, 2014

Buffalo Chicken Wonton Cups and Birthdays!

(Please ignore the x-mas napkin)

I can't believe it's already a new week again, what happened to the weekend?  I'm not complaining though, because I honestly like Monday's and this isn't any ordinary Monday either.  It's January 13th, which means it's my older sister Shannon's birthday!  "Happy Birthday Shanny!" 

I really wish I could be with her to help celebrate; but she's been sailing around Hawaii and French Polynesia for the past 30 days (If I sound jealous, I am, which is why I wish I could be there too to help celebrate).  Today also happens to be my friend Brad's birthday, "Happy Birthday Brad!"

On that note, birthdays seem to be popping up everywhere; January is a busy month!  I actually made two birthday cakes over the weekend, for two different parties that were going on.


In addition to baking birthday cakes, I also prepared some buffalo chicken wonton cups to take as a little appetizer to yet another birthday party.  These personalized little cups are always a huge hit and super easy to make!  Enjoy!

Buffalo Chicken Wonton Cups
Printer-Friendly Version

Makes about 18 cups
Ingredients:
2 large cans chunk chicken
2 blocks 1/3 less fat cream cheese
3 TBSP. Hidden Valley Ranch Dressing
3 cups shredded cheddar cheese, divided
½ - 1 cup Franks Red Hot Sauce
1 package wonton shells

Directions:
Preheat oven to 375 degrees and spray a muffin tin with a nonstick cooking spray; set aside.

In a large skillet, over a medium heat, add in the chunk chicken and breaking apart into bite size pieces and stirring around.  Continue to cook until just warm, 2-4 minutes.  Add in the blocks of cream cheese and stir around, with the chicken, until melted and mixed together.  When ready, pour in the ranch dressing, Frank’s Red Hot sauce, and 1 ½ cups of the cheese.  Stir those ingredients around until the cheese is melted and everything is nicely combined.

To assemble:
Begin by placing a wonton shell into the bottom of each well of the muffin tin.  After that, add on about a TBSP. of the chicken mixture and top with a little cheese.  Next, place over the chicken and cheese another wonton shell, making sure to press it down around the filling (almost so that it looks like a piece of ravioli).  Now, place on top of the wonton another TBSP. of the buffalo chicken mixture and then sprinkle on some more cheese.

When ready, place the tin into the oven and bake for 10-12 minutes, or until the edges of the wonton wrappers start to turn a nice brownish color.

Optional Garnish Ideas:
Blue Cheese or Feta crumbles
A slice of celery

Tuesday, November 19, 2013

Southwest Chicken Tortilla Soup


Thanks to my beyond obsession with Pinterest, it was another productive weekend around our household.  Jeff and I spent the majority of the afternoon, on Saturday, going back and forth between Home Depot and Lowe's.  We were on a mission to buy things that we needed, in order to make a plank wall for our entryway by the garage.  Overall, I'd have to say that our project was a big success!  The wall actually turned out better than I had imagined.  I'll be posting pictures later this week, including the link with step by step instructions.

Needless to say, that due to our busy weekend, I didn't have much time to cook.  Therefore, I needed to think of some dinners that would not be very time consuming.  Even though the temperatures were warm around these parts, I felt that soup would be a perfect choice.  I've always loved a good chicken tortilla soup, and know that I've posted a recipe for one before.   However, the recipe that I made this weekend is slightly different, has more of a kick, and includes more ingredients.  This soup was absolutely delicious, and one that I'll definitely be making again.     

Southwest Chicken Tortilla Soup
Printer-Friendly Version

Ingredients:
1 cup whole wheat elbow pasta, cooked
2 TBSP. extra virgin olive oil
2 garlic cloves, minced
½ yellow onion, chopped
4 cups chicken stock
1 can (15 oz.) tomato sauce
1 can (14.5 oz.) crushed tomatoes
1 can (4 oz.) green chiles, hot
2 tsp. chili powder
1 tsp. cumin
½ tsp. oregano
Dash of cayenne red pepper
Salt and pepper to taste
2 cups cooked, shredded chicken breast
1 cup corn kernels
2 TBSP. fresh cilantro, chopped
1 lime, juiced

Garnish Ideas:
Tortilla strips (I used Texas toast, chili lime flavor)
Avocado, diced
Shredded Cheese

Directions:
Set a Dutch oven, or a large stock pot, over a medium heat and add the olive oil.  After allowing the oil to heat for about a minute or so, add in the garlic and onion.  Sauté together until the onions become translucent in appearance.  Add in the chicken stock, tomato sauce, crushed tomatoes, green chiles, chili powder, cumin, oregano, and cayenne pepper.  Stir everything together and season with a dash of salt and pepper.  Now, place the cover on the pot and reduce the heat to a gently simmer.  Allow the soup to cook and thicken for around 15-20 minutes.

Once the soup is ready, turn the heat back up and add in the pasta, chicken, corn, cilantro, and lime juice.  Stir all the ingredients together and allow to cook for another 5 minutes or until the soup is warmed to your liking!

 
Place the soup into soup bowls and garnish with some fresh, diced avocados, a little cheese, and some tortilla strips.  Enjoy!

Source: Slightly adapted from Damn Delicious

Thursday, November 14, 2013

Restaurant Style Salsa


What is it about chips and salsa that's just so addictive and delicious?  Did you ever notice that when you go out to eat, especially at a Mexican restaurant, the chips and salsa seem to disappear quickly, and it's never very long before the server brings you another dish; even if you didn't want, or ask for them.  Then, that dish seems to disappear just as quickly as the one before.  It's an endless cycle.

The great thing about salsa though, is that you don't have to limit it to just being served with chips.  You can also add it to different recipes for extra spice and flavor, or you can always use salsa as a garnish.  I tend to put it on top of grilled chicken, or scrambled egg whites, because it seems to give the food that kick of flavor I'm looking for.  Plus, I love how healthy it is.

Jeff's been asking me to make salsa for quite some time now, because he's not really a fan of the salsa that comes from a jar.  The main reason that he doesn't like it, is because there are large pieces of tomatoes and onions, and to be honest, I don't really care for jarred salsa either.  That's why I'm kind of surprised that it's been so long since I've made a batch.  The whole process is super easy and isn't time consuming at all.  As an added bonus you can "can" the leftover salsa to serve at a later date.  All you have to do is go buy the vegetables, toss them in a food processor, and voilà!  You have salsa.

The thing that I like best about this particular salsa recipe, compared to some others, is that you decide how mild or hot you would like it, just by adding or subtracting the amount of peppers you add in.  If you follow the recipe as printed below it isn't incredibly hot, however I wouldn't exactly consider it mild either.  At first bite you might not think that the salsa is hot, and then it hits.  Enjoy!


Restaurant Style Salsa
Printer-Friendly Version

Ingredients:
1 can (28 oz.) whole peeled tomatoes with juice
2 cans Rotel tomatoes and green chilies (I use the HOT, but you can use original for a milder version)
½ a large onion, chopped
1 clove garlic, minced
1 whole jalapeno, sliced thin (I left the seeds in for a more spicy salsa)
1 whole habanero pepper, cut into small pieces (I left some of the seeds in)
¼ tsp. sugar
¼ tsp. salt
¼ tsp. ground cumin
½ cup – ¾ cup fresh cilantro (or more, if needed)
½ a lime, juiced

Directions:
Combine all of the ingredients listed in the bowl of a food processor and then pulse together until your desired consistency is reached.  Stop, taste, and then add more of the ingredients you think that it might need. (I didn’t add anymore)

Place the salsa in the refrigerator for at least an hour, in order to let the flavors combine; then serve.
 
 
Slightly adapted from Two Peas & Their Pod

Wednesday, November 13, 2013

Toasted Ravioli


Cooking seriously is such a huge passion of mine, and I'm loving the fact that I actually have time to do it again!  I know that I eventually need to get back out into the working world, and I plan to, but it's not going to stop me from enjoying the free time that I have right now. 

Not only have I been cooking a lot more lately, but I've also been feeling creative and doing other projects too.  I've really been wanting a front table for the entryway of our home, but didn't want to pay a lot, so I finally decided I would just make one.  I originally got the idea for the table, while looking at this picture here, and then followed tips on this helpful website, which provided me step by step directions on how to distress wood.  My finished table only cost $40 dollars to make!  (But I already had the paint leftover from another project, otherwise it would have cost just a little more)


Once the table was done though, I knew that I needed to decorate it, which meant a new project!  As you can see from the pictures, it's still a work in progress.  However, after visiting my sister in Las Vegas, and stealing the idea from her, I decided to make a piece of nail art to display on the bottom shelf.  I settled on an outline of Michigan, with a heart over where Grand Rapids would be, because that's my hometown and where I spent 25 years of my life.  No matter what, a piece of me will always consider it home.


So, that's how I've been spending my time lately.  Anyway....back to today's recipe, Toasted Ravioli.  Not only is this a quick, easy, and healthy meal, but it must be pretty darn good too, because my husband ended up eating the entire batch.  (You may need to double the recipe if you have more than two people you plan to serve)

Toasted Ravioli
Printer-FriendlyVersion

Makes 10-12 Ravioli's
Ingredients:
1 package Buitoni spicy beef and sausage ravioli (any kind would work)
1 egg
1 cup Italian seasoned bread crumbs
Marinara sauce
Parmesan cheese
Parsley (for garnish)

Directions:
Preheat oven to 400 degrees, then place an oven safe rack on top of a baking sheet; set aside.

Using a large pot, cook the ravioli according to the package directions.  Drain the water and set the prepared ravioli’s aside.

Now, get out two small bowls and in one bowl, crack and whisk the egg.  Then, in the other bowl, place the bread crumbs.

After that, you will take a ravioli piece and dip it into the egg mixture until both sides are well coated.  Then, dip it into the bread crumbs, making sure to flip the ravioli over, if needed.  Both sides of the ravioli should be well coated with crumbs before placing it onto the rack of the baking sheet.  Repeat these steps with the remaining ravioli pieces.

Place the baking sheet, with the ravioli’s, into the oven for 3-4 minutes.  Remove the sheet from the oven, flip the ravioli’s over, and cook for another 2-3 minutes.
 
Once the ravioli is done, remove the baking sheet from the oven and sprinkle on a little parmesan cheese and parsley.  Serve with a side of marinara sauce and enjoy!

Adapted from Budget Savvy Diva

Thursday, August 8, 2013

Baked Buffalo Chicken Egg Rolls


I know...I know....You might be tired of it, but this post is in fact another buffalo chicken one.  I can't help it though, I'm addicted. 

The great thing about this particular recipe, compared to some of the other buffalo chicken ones that I've posted, is the fact that it's not too bad for you.  This is mostly due to the fact that the egg rolls are baked instead of fried.  In addition to baking them, I tried to lighten the calorie count by using fat free, and low fat ingredients.

I absolutely love egg rolls and have been wanting to try to make some for awhile now.  However, I know that Jeff won't eat the traditional kind, therefore I decided to make my own version.  I still plan to try making the traditional variety one of these days; perhaps when Jeff goes out of town on business.  I'll keep you posted!

Baked Buffalo Chicken Egg Rolls
Printer-Friendly Version

Servings: 7-10, or can vary depending on how full you fill the egg roll shell
Ingredients:
17-20 oz. cooked, shredded chicken (I cheated and used mine out of a can)
4 oz. fat free cream cheese
¼ cup (or a little more) Frank’s Red Hot Sauce
1 tsp. ranch dressing (fat free)
1 cup or more, Shredded cheddar cheese (low fat)
Egg roll wrappers

Directions:
Preheat oven to 375 degrees and lightly coat a pan with olive oil.  I lightly sprayed PAM that contains olive oil in it.

Place the cream cheese in a small, microwave safe, bowl and then place it in the microwave for 15 seconds.  Stir the cream cheese around until smooth.  If needed, place it back in for a few more seconds.  *Don’t overcook*

In a medium bowl, add the shredded chicken, making sure that it’s warmed through.  If needed, place the chicken in the microwave for about 30 seconds or until warm to the touch.  In the same bowl, add in the cream cheese, Frank’s, ranch dressing, and ¼ to ½ cup of the cheddar cheese.  Stir the ingredients around until well combined.

To assemble:
Place a spoonful of the buffalo chicken mixture into the center of an egg roll wrapper, and top with a little cheddar cheese. 


Lightly coat the corners of the wrappers with water (to help hold it together) and then fold two of the corners inward and tightly roll up the rest.


Place the prepared egg rolls seam side down onto the baking sheet and very lightly coat with a little olive oil.  Bake for 15-20 minutes or until the egg rolls are a light golden brown.

Serve warm and enjoy!

Saturday, June 22, 2013

Chicken Enchilada Puffs


Chicken enchiladas are pretty much one of my all time favorite meals!  Ok, confession....I'm really a huge fan of any Mexican dish, as long as it's made well!  Unfortunately though, I don't always have time to make chicken enchiladas as detailed as I'd like to (I'll post my favorite chicken enchilada recipe soon).  Due to this I sometimes have to improvise, which is exactly what I did here.  The enchilada puffs turned out to be delicious, which is why I'm sharing the recipe, but they are definitely different from original enchiladas, if that's what you are looking for. 

I found that this recipe is perfect if you're short on time, plus, as an added bonus, they make for a great little snack or appetizer!

Chicken Enchilada Puffs
Printer-Friendly Version

Ingredients:
15 white frozen Rhodes dinner rolls (thawed)
1 cup Mexican blend shredded cheese
1 cup cooked chicken (diced or shredded)
            -while the chicken cooked, I seasoned it with a dash of cumin, cayenne pepper, chili powder and a little garlic powder.  I seasoned to our taste, this step is up to you.
1 can of enchilada sauce
1 jar of your favorite salsa (bought or homemade)
¼ cup Mexican blend shredded cheese for garnish

Directions:
Thaw the dinner rolls until they are no longer frozen.  (Don’t let rise)

Preheat the oven to 350 degrees and line a baking pan with parchment paper or a silicone baking mat; set aside.

First, flatten out the dinner rolls.  Then, directly in the middle of each roll place about a spoonful of salsa and enchilada sauce.  Add on about 2 tablespoons of chicken, and top with about a tablespoon of cheese.  Pull the sides of the dough up and around the ingredients and pinch closed so that the ingredients don’t fall out while baking.

Place the prepared puffs, sealed side down, onto the prepared baking pan.  Spread on some more of the enchilada sauce and garnish with desired amount of extra cheese.

Place the pan in the oven and bake for about 15-20 minutes or until the puffs have turned a nice golden brown color and are puffy in appearance.  Remove the pan from the oven and let cool for about 5 minutes.  Serve with extra salsa, sour cream, or guacamole.  Enjoy!
 
 
Source: Six Sister's Stuff

Monday, April 29, 2013

Loaded Baked Potato Dip

When I first saw this recipe for a loaded baked potato dip, I knew right away that I needed to make it!  Not only are loaded baked potatoes absolutely delicious, but dips are so quick and easy to toss together (especially if one is short on time).  In addition to this, they make a great side item or appetizer, which you can always serve at any party or function, no matter the time of year. 

I specifically made this dip for a get together/party that I went to on Saturday evening, and I'd have to say it was a hit!  The recipe actually turned out better than I was expecting (I ended up altering some of the ingredients) and I can definitely see myself making it again in the very near future!  So grab a bag of your favorite potato chips and enjoy!


Loaded Baked Potato Dip
Printer-Friendly Version

Makes about 4 cups
Ingredients:
16 oz. sour cream
3 Tbsp. light mayonnaise
16 slices (12 oz. package) bacon, cooked and crumbled (save a little for garnish)
2 cups shredded cheddar cheese, plus a little more for garnish
1/3 cup thinly sliced scallions
2 Tsp. Lowry’s seasoning
½ tsp. garlic powder

Directions:
Place all the ingredients into a medium size bowl and using a hand mixer, beat on a medium to low speed until well combined.  Cover the bowl and place in the refrigerator for at least 1 hour before serving.  This allows the flavors time to blend. 

Garnish with extra bacon, cheese, and scallions.  Serve with your favorite potato chips!
 
Adapted from Brown Eyed Baker

Saturday, February 23, 2013

Cheesy Cheese Bombs


How can a recipe ever go wrong when cheese is involved?  Well that's simple......it can't.  There's just something about the gooey texture of warm, melted cheese that's incredibly addicting.  And don't even get me started on how wonderful burnt cheese is......yummmmm......burnt cheese...........Ok, ok, I just need a minute to wipe the drool from the corner of my mouth and then I'll continue.

So where was I?  Oh yes....cheese bombs. 

These cheese bombs are super easy to make, especially when you're short on time and looking for a little snack, a good appetizer, or even a meal.  In addition to being easy, cheese bombs don't require a lot of ingredients.  However, you could choose to stuff the bombs with other ingredients, ultimately making them your very own.  Ingredient ideas that I plan to try out one day are: chopped green and red peppers, ham, sausage, etc.  The possibilities really are endless. 

Cheese Bombs
Printer-Friendly Version

Ingredients:
1 container Pillsbury Grands Flaky Layers Biscuits
1 package mozzarella cheese, cut into about 2” cubes
Olive oil (for brushing)
Grated Parmesan cheese, for garnish
Oregano/Italian seasoning, for garnish

Directions:
Preheat oven to 350 degrees.

While the oven is preheating, pop open the biscuits and flatten them out slightly, on a clean work surface.

Once the biscuit is flattened, place about 2-3 pieces of the cheese onto the center. 
 
 
Next, fold the sides of the biscuit up and over the cheese, until completely sealed.  Once the cheese bombs are ready, place them seam side down onto a baking pan.

Brush the tops of the bombs with a little olive oil and sprinkle on the Parmesan cheese, and oregano or Italian seasoning.  They are now ready to bake.
 
 
Place the cheese bombs in the oven for 15-20 minutes or until just until they start to turn a nice golden color.  Allow a few minutes to cool and then serve!

Source: Oh, Bite It

Sunday, January 20, 2013

Cheesy Pull Apart Bread on Crack


When it comes to writing something interesting for this post, I believe the image pretty much speaks for itself, which means that it doesn't need additional background information.  Therefore, let's just cut to the chase, because honestly, looking at the finished product, what's not to love about this bread?  For one thing it's bread (and who doesn't like bread?), and for another, it's covered in cheesy goodness.  Needless to say it was a huge hit!
 
Cheesy Pull-Apart Bread on Crack
Printer-FriendlyVersion

Ingredients:
1 round Italian loaf
1 stick butter, melted
1/8 cup EVOO (extra virgin olive oil)
1 Tbsp. onion, finely chopped
1 Tbsp. Dijon mustard
1 Tbsp. poppy seeds
3 garlic cloves, minced
3-4 tsp. chopped parsley
10-12 oz. shredded cheese (I used Sargento Artisan Blends – Double Cheddar)

Directions:
Preheat oven to 350 degrees

Cut the bread into cubes (size is up to you), making sure you DO NOT cut all the way through the bottom of the loaf.

In a medium bowl, combine the butter, EVOO, onion, mustard, poppy seeds, garlic, and parsley.

Pour the butter mixture over the loaf, making sure to definitely fill in the cracks using a small spoon, and spreading the mixture across the top.  This may seem time consuming, but it will definitely be worth your trouble.  Now, stuff the cheese down in the cracks.  This will work best if you use your hands.

 
Once the bread is ready, wrap it with aluminum foil, making sure that the sides are properly sealed.  Next, place the prepared loaf on a baking sheet and cook for around 15-20 minutes.  When done, remove the bread from the oven, take off the aluminum foil, and place it back into the oven.  Let the bread cook for another 10 minutes, until the cheese is all melted.

Enjoy!

Source: Food Wanderings in Asia

Saturday, January 5, 2013

Crabbies (A.K.A. English Muffin Crab Cakes)


Around my house it's never officially Thanksgiving or Christmas without serving crabbies.  Even if Jeff and I end up traveling somewhere for the holidays, I'll typically make them as my item to bring along.  Due to this, I've ended up sharing the recipe with numerous family members and friends, which is just one of the reasons why I felt, this year, I'd share it with everyone.

FYI - Something that I find especially great about crabbies, other than the fact that they're completely addicting, is that they're so simple to make, and incredibly easy to transport.  Another great thing about crabbies is that this recipe can be made ahead of time and left in the freezer until it's time to serve them, which is always helpful if you're short on time.

Crabbies (A.K.A. English Muffin Crab Cakes)
Printer-FriendlyVersion

Ingredients: Makes 12 muffins
1 can Bumble Bee Fancy White crab meat
1 container Kraft Old English cheese spread
1 stick butter, softened
¾ tsp. Lowry’s seasoning
½ tsp. garlic salt
1 Tbsp. mayonnaise
1 package English Muffins (I use Bay’s Multi-Grain)

Directions:
Place the first 6 ingredients in a medium size bowl and beat together, with a hand mixer, until well blended. 

Separate the English muffins in half and lay them out on a flat work surface.

Next, spread some of the prepared crab/cheese mixture onto each of the English muffin half’s.  Once ready, wrap the crabbies up in tin foil, and place them in the freezer for 4 hours, or until you are ready to serve.  (I’ve left mine in the freezer for days/weeks, and they still turned out fine)   

When ready to serve, set the oven to broil, remove the crabbies from the freezer, and place them on a baking sheet.  Place the crabbies into the oven for about 8 minutes or until the cheese mixture starts to turn a nice golden brown color and appears bubbly.  Keep an eye on them while baking, because this can happen fast.  Once ready, remove the baking sheet from the oven and allow a few minutes to cool.  Finally, cut each English muffin into 4 or 6 small triangles and serve.  (I find using a pizza cutter especially helpful when it comes to cutting the crabbies)

Wednesday, December 26, 2012

Guacamole


One of my favorite things about going out to eat at a Mexican restaurant is the endless amounts of chips and salsa they bring to your table.  Even better than that though, is ordering up a side dish of scrumptious guacamole.  Throughout the years I've tasted many different recipes, however, when my friend Kristen brought hers over one day, I knew that I'd never follow another recipe again.  This one is definitely the best!

Guacamole
Printer-FriendlyVersion

Ingredients:
2 avocados
1 jalapeno pepper, seeded and minced
1 Roma tomato, chopped
1 small white onion, finely chopped
1 garlic clove
1 lime, cut into two
Bunch of cilantro, about 4 or 5 stems (more if desired)
1 Tbsp. sea salt (or more, depending on taste)

Directions:
Scoop the insides out of the avocados and place in a medium bowl.  Add in the minced jalapenos, onion, and the juice squeezed from half of the lime.  Mash and stir the ingredients together until you reach desired consistency.

Add in the Tbsp. of salt, tomato, garlic, cilantro, and the juice from the other half of the lime.  Mix together until well blended.  Serve with a side of tortilla chips!