RSS

Sunday, December 30, 2012

Overnight Baked French Toast with a Cinnamon Crumb Topping


I meant to post this recipe sooner, but apparently it got buried and sadly forgotten.  It's a shame too, because this would have made a perfect Christmas morning dish.  Either way, it needs to be shared, so here goes.....

This past weekend (about a month or two ago now) my mother-in-law was in town and I was looking for something quick and easy to make for breakfast.  Of course, the usual thoughts came to mind......French toast, pancakes, oatmeal, eggs, doughnuts, bacon, etc.

After all those thoughts, I finally settled on French toast, because let's be honest.....who doesn't like French toast? 

Overnight Baked French Toast with a Cinnamon Crumb Topping
Printer-FriendlyVersion

Serves 6-10 (depending on size of pieces)
Ingredients:
1 loaf stale challah bread (or your choice)
8 eggs
2 cups milk (I use skim)
½ cup heavy whipping cream
¾ cup granulated sugar
2 Tbsp. vanilla

Topping:
½ cup all-purpose flour
½ cup packed light brown sugar
1 ½ tsp. cinnamon
¼ tsp. salt
1 stick cold butter, cubed

Directions:
Lightly coat a 9x13 inch baking dish with non-stick cooking spray.  Set aside.

Tear the bread into pieces and place them into the prepared baking dish.  In a medium bowl, whisk together the eggs, milk, cream, sugar, and vanilla.  Pour the egg mixture evenly over the bread, cover and refrigerate overnight. 

In another bowl, mix together the flour, light brown sugar, cinnamon and salt.  Next, cut in the butter until the topping begins to come together and little pebble size pieces start to form.  Place in a plastic bag and put in the refrigerator overnight.

The next day:
Preheat the oven to 350 degrees.

Take the baking dish, that contains the egg/bread mixture, and evenly sprinkle on the cinnamon crumb mixture.

Bake for 45 minutes to 1 hour, depending on how soggy or done you like your French toast. 
            *Less time = more soggy

Serve warm with butter or maple syrup!

 
 Adapted from: Lovin from the oven

Wednesday, December 26, 2012

Guacamole


One of my favorite things about going out to eat at a Mexican restaurant is the endless amounts of chips and salsa they bring to your table.  Even better than that though, is ordering up a side dish of scrumptious guacamole.  Throughout the years I've tasted many different recipes, however, when my friend Kristen brought hers over one day, I knew that I'd never follow another recipe again.  This one is definitely the best!

Guacamole
Printer-FriendlyVersion

Ingredients:
2 avocados
1 jalapeno pepper, seeded and minced
1 Roma tomato, chopped
1 small white onion, finely chopped
1 garlic clove
1 lime, cut into two
Bunch of cilantro, about 4 or 5 stems (more if desired)
1 Tbsp. sea salt (or more, depending on taste)

Directions:
Scoop the insides out of the avocados and place in a medium bowl.  Add in the minced jalapenos, onion, and the juice squeezed from half of the lime.  Mash and stir the ingredients together until you reach desired consistency.

Add in the Tbsp. of salt, tomato, garlic, cilantro, and the juice from the other half of the lime.  Mix together until well blended.  Serve with a side of tortilla chips!


Monday, December 24, 2012

Old Fashioned Southern Pralines


Having lived in the South for quite a while now, I've had the chance to experience some excellent tasting pralines.  Whenever you walk into a candy shop in Charleston, Savannah, or other cities down here, they're always offering up a sample and I'm always willing to give them a taste.  The only down side to pralines is the fact that they're very expensive to purchase. 

Due to that fact, I've tried making them numerous times, using a variety of methods.  Some of the pralines have turned out, and some not so much.....instead I had a gooey, runny mess.  It wasn't until this past week though, that I finally found a recipe I loved!  Since then, I've followed this recipe 3 times, due to family requests, and I've also been asked, by friends, to please share it so that they could make a batch for the holidays.  That's when I decided to just share this recipe with everyone!  So here it is......you might notice that there's nothing healthy about pralines, but that's ok it's just one reason you know they're delicious!

Happy Holidays!

Old Fashioned Southern Pralines
Printer-FriendlyVersion

Makes about 20-50 pralines (depending on size)
Ingredients:
1 ½ cups granulated sugar
¾ cup light brown sugar, packed
½ cup heavy cream
6 tablespoons butter
1 tsp. vanilla
1 ½ - 2 cups chopped pecans

Directions:
On the counter, lay out a piece of parchment paper (this will be used later to put the pralines on to cool).  Tip: If you use wax paper, place something underneath so that the hot paper won’t stick to your counter.

Now, Place the sugars, heavy cream, butter and vanilla into a medium size sauce pan over medium heat.  Continuously stir the ingredients around until the mixture reaches the “soft ball stage” (238-240 degrees) on a candy read thermometer.  Once ready, immediately remove from heat.

Add in the pecans and continuously stir around until the mixture becomes creamy and cloudy in texture, the pecans start to stay suspended, and it begins to thicken a little (but not too much).  This process could take about 1-2 minutes, so don’t give up.  Once ready, drop the mixture by spoonful’s onto the prepared parchment paper.  Allow to cool completely. 

**For a different taste, feel free to add roasted pecans.  To make roasted pecans, place them on a baking sheet and bake at 275 degrees for 20-25 minutes, or until slightly brown and fragrant.** 

Source: Slightly adapted from Picky Palate originally from The New Orleans School of Cooking

Sunday, December 23, 2012

Scotcheroos


Tis' the season for baking, right???  Well, at least that's how it would appear around here. 

However, it's a good thing, especially for my hips sake, that the new year is coming soon.  That means time for some resolutions, and a sugar detox might just be at the top of that list. Apparently, Christmas time means stuffing yourself, or others, full of sugary goodness.  No wonder Santa's always so jolly!  He never has a chance to crash from his sugar high! 

Today's recipe is one of my favorites though!  Scotheroos are a great combination of peanut butter, chocolate, and rice krispie treats.  With those ingredients, how could one go wrong?

Scotcheroos
Printer-FriendlyVersion

Ingredients:
1 cup light corn syrup
1 cup light brown sugar, packed
1 cup peanut butter
6 cups rice krispies
1 (12 oz.) bag semi-sweet chocolate chips
1 (12 oz.) bag butterscotch chips

Directions:
Generously grease a 9x13’ baking dish with nonstick cooking spray and set aside.

In a medium sauce pan, combine the corn syrup and brown sugar.  Continue to stir together and bring the mixture to a boil; then remove the pan from the heat.  Next, add in the peanut butter and stir around until the mixture is completely smooth.  Once ready, pour in the rice krispies, and using a wooden spoon, stir around until the cereal is completely coated.  Pour the mixture into the prepared baking dish and spread around.  Set the dish aside and allow to cool completely.

Once the rice krispies have cooled, combine and melt the semi-sweet chocolate chips and the butterscotch chips in a microwave safe container.  Pour the melted chocolate/butterscotch over the rice krispies and evenly spread around with a spatula.  Allow the scotcheroos to cool completely before cutting to serve.

Friday, December 14, 2012

Roasted Jalapeno, Bacon, and Cheddar Grilled Cheese


Let me preface this post by informing everyone that I'm always on the lookout for new and intriguing foods to include when I make a grilled cheese sandwich.  Ever since I was a little girl, I've been a huge fan of the original.  Mostly due to the fact that it was easy, made a quick meal, contained cheese (I can't live without that!), and we always seemed have the ingredients on hand.  Nowadays though, I find that I feel a bit more creative when it comes to making a grilled cheese sandwich.

Let that be your warning then.....This recipe is not for your typical grilled cheese sandwich.  In fact, it takes the idea of the original to an entirely new, exciting, and spicy level! 

"How?" you might ask. 

Well, first you use 2 thick slices of sourdough bread, then you add on a layer of the cream cheese mixture, followed by some roasted jalapeno peppers, bacon crumbles, and finally you top it off with a slice of cheddar cheese.  Absolute perfection on toasted bread!  What could be better?

Roasted Jalapeno, Bacon, and Cheddar Grilled Cheese
Printer-FriendlyVersion

Makes 1 sandwich, but feel free to double ingredients for more
Ingredients:
2 slices sourdough bread (or any bread)
2 oz. cream cheese, softened (I use 1/3 less fat)
1/8 tsp. chili powder
2-3 slices cooked bacon, crumbled
1 jalapeno pepper, sliced
Butter

Directions:
To Roast the Peppers
Set the oven to broil and then place the jalapeno slices onto a baking sheet.  Place in the oven and bake until the skins start to blacken.  Keep a close eye on them so they don’t burn.  Once ready, remove the jalapenos from the oven and immediately place into a zip lock bag allowing them to steam until cool to the touch.

To Make the Cream Cheese Mixture –
Place the cream cheese into a small bowl and add in the chili powder.  Using a hand mixer beat the mixture until smooth.

To Make the Grilled Cheese –
First, you will need to take one of the two slices of sourdough bread and spread the cream cheese mixture evenly onto a side.  Next, on top of the cream cheese spread, you will need to place a layer of bacon, followed by some jalapeno peppers, and finally a slice of cheddar cheese.  Now, just spread some more of the cream cheese mixture onto one side of the other slice of bread and place it on the sandwich, cream cheese side down.  Once the sandwich has been put together, gently butter each side of the bread. Lastly, place the sandwich into a skillet, set over medium heat, and allow to toast until the bread turns that nice golden brown you long for. This should take about 2-4 minutes per side.

Source: Adapted from Basil

Friday, November 23, 2012

Twisted Buffalo Chicken Lasagna


Lately, it seems that I've been all about cooking things in the crock pot.  This is mostly due to the fact that my weekends have been super busy and it's just all too easy to toss ingredients into the pot and let it do the work.  Plus, there are just so many delicious crock pot recipes out there.

As of right now, anything that contains buffalo chicken is pretty much my favorite food, so when I happened to stumble upon this recipe, I knew right away that I needed to make it.  I'll admit I was a little nervous at first though, due to the fact that the recipe called for pasta sauce to be combined with Frank's Red Hot sauce.  At the time, the mixture of these two ingredients just didn't sound very appetizing, however, I love it when I'm wrong!  Needless to say, this meal is definitely addictive and I have no shame in admitting that I went back for seconds!

Twisted Buffalo Chicken Lasagna
Printer-FriendlyVersion

Ingredients:
3-4 chicken breasts (cooked and chopped or shredded)
1 cup Frank’s Red Hot Sauce
1 jar (24 oz.) pasta sauce (I used Prego Roasted Garlic and Herb)
1 package uncooked lasagna noodles
1 container ( oz) fat free ricotta cheese
Shredded cheddar cheese
Shredded mozzarella cheese
¼ cup water

Optional Ingredients:
Red or green pepper
Spinach
Onion

Directions:
Coat the sides and bottom of a 5 qt. crock pot with a non-stick cooking spray.

In a medium size bowl, combine the chicken pieces, Frank’s sauce, and pasta sauce.  Toss the ingredients together until the chicken pieces have been fully coated and the sauces are well blended.

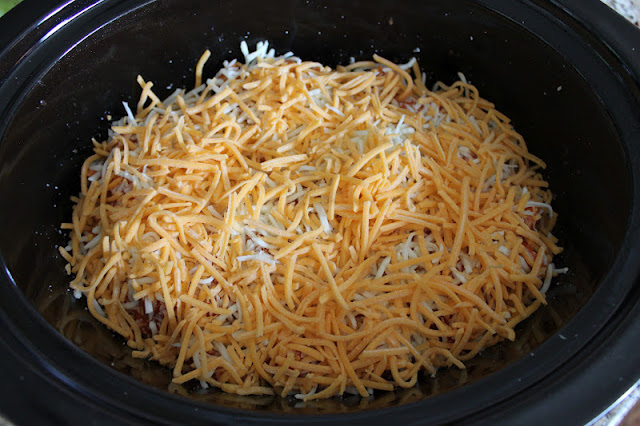
Next, scoop a large spoonful of the chicken/pasta sauce into the crock pot.  There should be enough of the sauce to evenly coat the bottom.  After that, add on a layer of lasagna noodles…..FYI- you may need to break up some of the noodles in order for them to fit properly.  You could also choose to add on another layer of noodles, if desired.  Spread a layer of ricotta cheese over the noodles and top with the cheddar and mozzarella cheese.  This is also the step where you would add in any of the optional ingredients.  Repeat the layers until you run out of ingredients, but make sure that you top the final layer with the sauce and the cheese.  Once ready, pour the ¼ cup water over the top of the lasagna.

Cook on low for 4-5 hours, or on high for 2 ½ to 3 hours.

Source: Slightly adapted from Hot Mama's Blog

Monday, October 1, 2012

Pumpkin Spice Latte Cupcakes


Fall is definitely my favorite season!  I absolutely love everything about it!

The other morning, when I woke up, I noticed that the leaves in our backyard have finally started turning their beautiful, vibrant colors, the mornings have begun to cool off, allowing me to get out my sweaters, jeans, and jackets, and I noticed that Starbucks has begun selling their pumpkin spice lattes again.  Added up, these things can only mean one thing......October is officially here!  And what better way to welcome it back, than with delicious, pumpkin inspired food! 

However, I hate making decisions when there are so many good options out there, and what recipe I should start this October with is always the question I ask myself year after year?  Well, after much internal debating, and seeing that I'm such a big fan of coffee, I decided that this year I would pay tribute to Starbucks and their pumpkin spice lattes by creating my own version.  The main difference being that mine would be made in cupcake form!  However, I'm not saying that it couldn't be enjoyed with a nice latte!

Pumpkin Spice Latte Cupcakes
Printer-FriendlyVersion

Servings: 24 cupcakes
Ingredients:

For cupcakes:
2 2/3 cups all-purpose flour
3 Tbsp. espresso powder
2 tsp. baking powder
2 tsp. baking soda
1 ½ tsp. ground cinnamon
¼ tsp. nutmeg
1/8 tsp. ground cloves
1 tsp. salt
1 can (15 oz.) pumpkin puree
1 cup sugar
1 cup light brown sugar
¼ cup vegetable or canola oil
¾ cup unsweetened applesauce
4 eggs
½ cup coffee or espresso, for brushing

For the frosting:
2 ¼ cups heavy cream, chilled
¼ cup confectioner’s sugar

Garnish:
Cinnamon
Caramel sauce

Directions:

For the Cupcakes:
Preheat oven to 350 degrees and pre-line a cupcake pan with liners. 

In a medium bowl, whisk together the flour, espresso powder, baking powder, baking soda, salt, cinnamon, nutmeg, and cloves.  Set aside.  Next, in the bowl of an electric mixer, set to a medium speed, beat together the pumpkin puree, sugar, brown sugar, oil, and applesauce until well blended.  Add in the eggs, one at a time, making sure to beat well after each addition and scraping the sides of the bowl as needed.  Set the mixer on a low speed and slowly add in the flour mixture in two additions, mixing until it is just incorporated.  Make sure not to over mix.

Scoop the batter into the cupcake liners, filling about three-quarters full.  Bake for about 18-20 minutes, or until a toothpick inserted in the middle comes out clean.  Place the pans on a wire rack and allow to cool for 10 minutes.  Next, remove the cupcakes from the pan and while the cupcakes are still warm, brush them over with the coffee or the espresso, repeating the step again after the first layer has absorbed into the cupcake. After that, allow them to cool completely.  

For the Frosting:

Place the heavy cream in the bowl of an electric mixer, fitted with the whisk attachment.  At first, beat the cream at a medium to low speed, gradually increasing it to high.  While beating the cream, slowly add in the confectioner’s sugar, a little bit at a time.  Beat until stiff peaks form, being very careful not to overbeat.  Once the frosting is ready, use a pastry bag, fitted with a decorative tip to frost the cupcakes.  Garnish with a little cinnamon or drizzle lightly with caramel sauce (or both).

Soure: Slightly adapted from Annies Eats

Sunday, September 30, 2012

Cheesy Chicken and Rotel Spaghetti


A few years back a co-worker, and friend, introduced me to an absolutely addicting and easy to make appetizer/snack.  In fact, it's so simple that it only requires two ingredients: half a brick of Velveeta cheese and one can of Rotel.  Melt the two together ingredients together in the microwave, for 5 minutes, stirring halfway through, and you have the BEST chip dip ever!  Seriously......it's beyond addicting.

This weekend however, I decided to take the dip to a whole new level and incorporate it into a meal.  Looking back now, it was probably a mistake on my part, only because it turned out fantastic and is just as addicting as the dip itself.  I easily see this meal becoming a regular addition to our dinner menu.

Cheesy Chicken and Rotel Spaghetti
Printer-FriendlyVersion

Ingredients:
1 1/2 lb. chicken breasts, cubed
1 can (10 ¾ oz.) cream of chicken soup
1 can (10 oz) Rotel diced tomatoes and green chilies (I use HOT)
1 garlic clove, minced and ¼ tsp. garlic powder
½ tsp. onion powder
16 oz. Velveeta cheese, cubed
1 package spaghetti noodles
Cheddar cheese, shredded (optional)

Directions:
Preheat oven to 350 degrees.

Cook spaghetti according to package directions, drain and set aside.

Spray a 9x13” baking dish with nonstick cooking spray and set aside.

In a large skillet, set over medium-high heat, add the cubed chicken pieces, garlic, and onion powder.  Cook until the chicken is no longer pink.  Reduce the heat to low and add in the soup, cheese, and Rotel.  Continuously stir around until the cheese has completely melted and all the ingredients are well combined. 


Once the chicken and cheese sauce is ready, pour it over the spaghetti noodles and toss together.  Transfer the prepared spaghetti to the 9x13” baking dish and top with some cheddar cheese, if desired. 


Bake for about 30 minutes or until heated through and cheese is melted.
 
Source: Adapted from Plain Chicken 

Sunday, September 23, 2012

Slow Cooker Lemonade Chicken


I know it's almost fall and I'll have some wonderful fall recipes to post soon.  However, it seems that I've gone MIA for the past few months and am now a little behind!  I've just been so busy lately that everything seems to be continuing to pile up, making it very difficult to get ahead.

Therefore, I have an old recipe for you today!

I've always been a huge fan of lemonade, especially in the summertime, but when I chose to cut back on my sugar intake a few years ago, it was one of the things I decided to give up. However, just because I decided not to drink lemonade by the glass anymore, it in no way means I can't use it when I'm cooking.

So here's a delicious dinner for you to try!

Slow Cooker Lemonade Chicken
Printer-FriendlyVersion

Ingredients:
4 chicken breasts
1 (6 oz.) container frozen lemonade concentrate, thawed
5 Tbsp. light brown sugar
¼ cup ketchup
2 Tbsp. white vinegar
2 Tbsp. cornstartch
2 Tbsp. cold water
Brown rice (optional)

For the veggie portion:
1 Tbsp. olive oil
1 ½ cup broccoli florets
1/3 cup carrots, chopped
½ cup snap peas
1 green pepper, cut into chunk size pieces
½ a white onion, cut into chunk size pieces

Directions:
For the Chicken:
Evenly coat the inside of a crock pot with nonstick cooking spray.  Next, place the 4 chicken breasts on the bottom of the pot.  In a medium bowl, combine the lemonade concentrate, light brown sugar, ketchup, and vinegar.  Whisk together until well combined.  Pour the lemonade mixture over the chicken.  Cover and cook on low for 6-8 hours or on high for 3-4 hours.  Remove the chicken from the crock pot and place on a flat work surface.  Using two forks, shred the chicken into pieces and place in a bowl.  Cover with foil to keep warm.

In a small bowl, mix together the cornstarch and cold water.  Pour the remainder of the lemonade sauce from the crock pot into a skillet.  Simmer the sauce over a medium heat making sure to pour in the cornstarch mixture and then stir around until it’s completely combined.  Let the sauce continue to cook, over a medium heat for about 5 minutes, or until the sauce becomes thick or reaches your desired consistency.  Once ready, pour the sauce over the chicken and toss to evenly coat the chicken.

For the Veggies:

 
Place the olive oil in a medium to large skillet, over a medium heat, and allow the skillet to warm up for about a minute.  Now, add in all the vegetables and sauté until done.  This may take a few minutes, depending on how crunchy or soft you like your vegetables.


To assemble:
Scoop some brown rice onto a clean plate, top the rice with some veggies, and then place on top of that a spoonful of chicken.  Garnish with sesame seeds and enjoy!

Slightly adapted from Six Sisters' Stuff

Thursday, September 6, 2012

Oatmeal Raisin Cookies


I'm a little embarrassed by the fact that I haven't posted this recipe before now; mostly because I made these cookies way back in July.  Personally, I'm not a big fan of oatmeal raisin cookies, and never have been.  I love oatmeal cookies, but don't really care for raisins.  So, I guess the question becomes "why make them then?".  Well, I really wanted to bake the builder of our new home a special treat.  He knew that I loved to bake (which is why I opted for many kitchen upgrades) and I wanted it to be a way of saying thank you for doing such an amazing job!  Oatmeal raisin cookies are his favorite, so that's what I decided to make!

Due to my dislike of raisins though, I unfortunately didn't have an oatmeal raisin cookie recipe.  Therefore, I had to search around online and hope for the best.  After visiting a lot of different food blogs, and other food sites, I ended up finding this recipe.  It's not exactly like the original, because I ended up tweaking it a little by adding a few ingredients of my own, that I thought would add more flavor!  Here's the final recipe I decided on and will definitely be using again.  I was told that the cookies were not only delicious, but very soft and chewy.

Oatmeal Raisin Cookies
Printer-FriendlyVersion

Ingredients:
½ cup (1 stick) butter, softened
2/3 cup light brown sugar, packed
1 egg
½ tsp. vanilla extract
¾ cup all-purpose flour
½ tsp. baking soda
¾ tsp. cinnamon
¼ tsp. nutmeg
¼ tsp. salt
1 ½ cups old fashioned oats
¾ cup raisins
½ cup chopped walnuts, or pecans (optional, but delicious)

Directions:
Preheat oven to 350 degrees and line a baking sheet with a silicone mat, or a piece of parchment paper.

In the bowl of a stand mixer, set on a medium to high speed, cream together the butter, brown sugar, egg, and vanilla extract until smooth.  In a medium size bowl, whisk together the flour, baking soda, cinnamon, nutmeg, and salt.  Pour the flour mixture into the butter mixture and beat on a low speed until just combined.  (Make sure you scrape the sides of the bowl as needed.)  Using a wooden spoon, stir in the oats, raisins, and walnuts/pecans (which are optional).

Using plastic wrap, cover the bowl that contains the cookie dough and place in the refrigerator for 30 minutes or longer.  This will allow time for the dough to sit and firm up a bit, which will make it easier to scoop.

Scoop the dough onto the prepared baking sheet(s) about 1-2 inches apart.  Bake for 10-12 minutes, making sure to remove the cookies when the sides start turning a light brown, and the top looks slightly undercooked.  Remove the baking sheet from the oven and allow to cool on a wire rack for 5 minutes.  When 5 minutes is up, remove the cookies from the baking sheet and place on the wire rack to cool completely.

Source: Adapted from Smitten Kitchen

Sunday, August 19, 2012

Soft and Chewy Double Dark Chocolate Cookies


*WARNING* You may experience chocolate overload!

I think it's safe to say that I've found a new chocolate addiciton and these cookies are it!  Not only are they incredibly soft and moist (almost like a fudgy brownie), but they're also filled with a variety of chocolate.  Be careful though, due to the deliciousness of these cookies, they'll disappear before you know it.

Sidenote: Broken up pieces of these chocolaty delights make an excellent topping for a bowl of ice cream.

Soft and Chewy Double Dark Chocolate Cookies
Printer-FriendlyVersion

Makes: About 42 cookies
Ingredients:
2 cups all-purpose flour
¼ cup unsweetened cocoa powder (I use Hersey’s)
¼ cup special dark chocolate cocoa powder (Hersey’s)
2 tsp. baking powder
½ tsp. salt
10 oz. semi-sweet chocolate, chopped
6 oz. bittersweet chocolate, chopped
4 large eggs
2 tsp. vanilla extract
2 tsp. instant espresso powder (or instant coffee powder would work too)
10 Tbsp. butter, softened but still cool
1 ½ cups light brown sugar, packed
½ cup granulated sugar
1 cup milk chocolate chips (or semi-sweet)
1 cup dark chocolate chips

Directions:
In a medium bowl whisk together the flour, cocoa powders, baking powder, and salt.  Set aside.

Melt together the semi-sweet and bittersweet chocolate.  There are two ways that you can go about doing this.  One way is to use a heat proof bowl, set over a pan of simmering water.  All you have to do is add the chips into the bowl and slowly stir around until melted.  If you are in more of a hurry though, and want something faster, combine the chocolates in a heat proof bowl and place the bowl in the microwave, cooking in 30 second intervals.  It’s very important to make sure to stir the chocolate around after each interval, until it’s completely melted.

In a small bowl, whisk together the eggs, vanilla, and espresso powder.  Once the ingredients are well combined, set aside.

In the bowl of electric mixer, fitted with the whisk attachment and set to a medium speed, beat the butter until smooth and creamy.  Scrape down the sides as needed.  Add in the sugars and beat together until a grainy texture begins to form.  Reduce the mixer speed to low and pour in the egg mixture.  Slowly beat together until well blended, making sure to scrape the sides and bottom of the bowl, as needed.  Next, slowly pour in the melted chocolate in a steady stream and mix together until completely combined.  Once ready, add in the dry ingredients and beat on a low to medium speed until just combined.  (As always, scrape the bottom and sides of the bowl)  Fold in the chocolate chips with a rubber spatula.  Cover the bowl with plastic wrap and let sit at room temperature for about 30 minutes or until the consistency is thick, almost like fudge.

While the dough is sitting out, preheat the oven to 350 degrees and line 2 baking sheets with silicone baking mats, or parchment paper.  Scoop the dough into 1 inch balls and place them onto the prepared baking sheets about 1 to ½ an inch apart.  (I found it helpful to lightly flour my hands and roll the dough into balls.  This made for rounder cookies.) 

Bake the cookies for around 10 minutes or until the edges of the cookies just begin to set, but the middles still look soft.  Rotate the pans halfway through baking.  Remove the baking sheets from the oven and place on a wire rack.  Allow the cookies to cool on the pan for 10 minutes and then transfer them to the wire racks to cool completely. 

Allow the pans time to cool completely before scooping more dough on them and returning them to the oven.

Enjoy!

Source: Adapted from Annie's Eats

Wednesday, August 8, 2012

Chicken and Cheddar Cheese Risotto


Wow, I cannot believe how fast this summer is going.  Sadly, I've not been posting as many recipes as I would like, but it seems that I've been much busier than expected.  In addition to the many vacations I had planned, Jeff and I also moved into our new house, and just in time to celebrate our 7 year wedding anniversary.  It was a wonderful present to ourselves, but its meant a lot of unpacking and arranging things; a task that's proven to be much more time consuming then one might expect (we're still not done). It has been well worth it though because I absolutely love it here!  And the kitchen is everything I could want!

As I mentioned above, Jeff and I celebrated our 7 year wedding anniversary in July and in order to help us celebrate I decided to take advantage of "my", even though it's "our", new kitchen and make a nice romantic dinner (I'm not really one for going out to eat, even though Jeff always offers to take me).  Jeff and I both love risotto, and I don't make it too often, so I decided to give this recipe a try.  I ended up altering it a bit from the original though by incorporating chicken pieces, however, adding the chicken was a personal preference (for some protein) but is something that could always and easily be eliminated.  Either way you choose to make it, the meal will still taste fantastic!

Chicken and Cheddar Cheese Risotto

Servings: 4
Ingredients:
2 chicken breast, cut into 1 inch (or smaller) pieces
1 Tbsp. olive oil
1 garlic clove, minced
1 Tbsp. butter
1 Tbsp. vegetable oil
2 scallions chopped, plus a little extra for garnish
1 ½ cups Arborio rice
½ cup white wine
½ tsp. Dijon mustard
4 cups hot vegetable stock
1 ¼ cup sharp cheddar cheese, shredded

Directions:
Heat the olive oil in a medium skillet, over medium-low heat.  Add in the minced garlic and sauté for about 30 seconds, or until fragrant.  Next, add in the chicken pieces and cook until done.  Remove the pan from the heat, and cover the chicken to keep warm.

In a deep pan, melt together the butter with the vegetable oil.  Place the scallions in the pan and allow to cook, making sure to stir frequently until softened; this will take about 2-3 minutes.  Next, add the rice, stir around, and continue to cook for another minute or two.  Increase the heat to a medium-high and add in the white wine and mustard.  Continue to stir around until the wine is completely absorbed.

While constantly stirring, pour the vegetable stock into the pan, one cup at a time, continuing to add more, only after the previous cup has been completely absorbed by the rice.  Cook the rice until it is al dente.  (This whole process will take about 20 minutes or so of constant stirring.  It’s important to be patient and let the stock fully absorb before moving on.)  Once ready, add in the cheese and chicken pieces, and stir together until the cheese has completely melted.

Scoop into serving bowls, garnish with a little extra cheese and scallions, and enjoy!

Source: Adapted from The Curvy Carrot

Tuesday, July 10, 2012

Samoa Scones (Girl Scout Inspired)


I'm not going to lie......I always get a little (ok....very) excited when it's that time of year for the Girl Scouts to come out and sell their cookies.  No matter if I'm trying to eat healthy or not, I find that I must order a box, or two, or three..............

I don't know what it is about Girl Scout cookies that make them absolutely addicting, but I know I'm not the only one who thinks so.  Like many others, I have two personal favorites when it comes to cookie flavors: Samoas and tagalongs!

Sadly, Girl Scout cookie season is over, and my boxes of cookies are long gone.  The other day though, I found that I was having a strong craving for some samoas and decided to do something about it.

These samoa scones have the same sweet and buttery taste of the Girl Scout cookie, just in a different form.  The actual scone itself is somewhat plain, consisting of a sugar, butter, and flour base.  Once the scone is cooked though, that's when you add on the real sweetness; a bottom layer of melted semi-sweet chocolate, and then top with a mixture of caramel and coconut.  You also can't forget to add the chocolate drizzle!

Samoa Scones (Girl Scout Inspired)
Printer-FriendlyVersion

Makes 8 scones
Ingredients:
3 cups all-purpose flour
½ cup sugar
2 tsp. baking powder
¼ tsp. salt
½ cup butter, chilled and cut into pieces
¾-1 cup skim milk
8 oz. semi-sweet chocolate
1 cup caramel sauce (store bought or homemade)
¾ cup shredded coconut

Directions:
Preheat oven to 400 degrees and line a baking sheet with a silicone baking mat or parchment paper.

In a large bowl combine the all-purpose flour, sugar, baking powder, and salt.  Whisk together.  Cut the butter pieces into the flour mixture using a pastry cutter, knife, or your hands.  Continue to cut in until there are no pieces larger than a pea remaining.  (You can always use a food processor for this step)

Pour ¾ cup milk into the flour mixture and stir around using a wooden spoon until a round dough forms.  You may need to slowly, as needed, add in a little more milk to help form the dough.  Once ready, divide the dough into two equal size balls and place them on a lightly floured surface.  Working with one section at a time, flatten the balls into disks about ½ an inch thick.  Cut each disk into quarters, and place the pieces onto the prepared baking sheets.  Bake the pieces in the preheated oven for 16-20 minutes or until the scones begin to turn a light golden color.  Remove from oven and allow to cool completely on a wire rack.

Melt the chocolate pieces in a microwave safe bowl.  Now, using a knife or spoon, evenly spread a layer of chocolate across the bottom of each scone.  Place the prepared scone onto a piece of wax paper, with the chocolate side facing down.  (Don’t worry……the scone will easily peel off once the chocolate hardens)  Allow time to cool completely. (Placing in the fridge will help speed this process along)

Place the caramel and coconut in a small bowl and stir around until well combined.  Spread an even amount of the mixture onto the top of each scone.  Finish off by drizzling on some of the extra melted chocolate.  Allow time to harden, than serve.  These scones can be stored in an airtight container.


Source: Baking Bites