RSS

Tuesday, July 23, 2013

Pizza Nacho Skillet


I think the name of this recipe pretty much speaks for itself.

Pizza + Nachos = Delicious!
(Because let's be honest......who doesn't love both!)

The best thing about this particular recipe too, is that you can add or subtract any of the ingredients listed, in order to customize the meal, really making it your own!

Enjoy!

(Consider these directions and ingredients list more like 'guidelines')
Pizza Nacho Skillet
Printer-Friendly Version

Ingredients:
Tortilla 
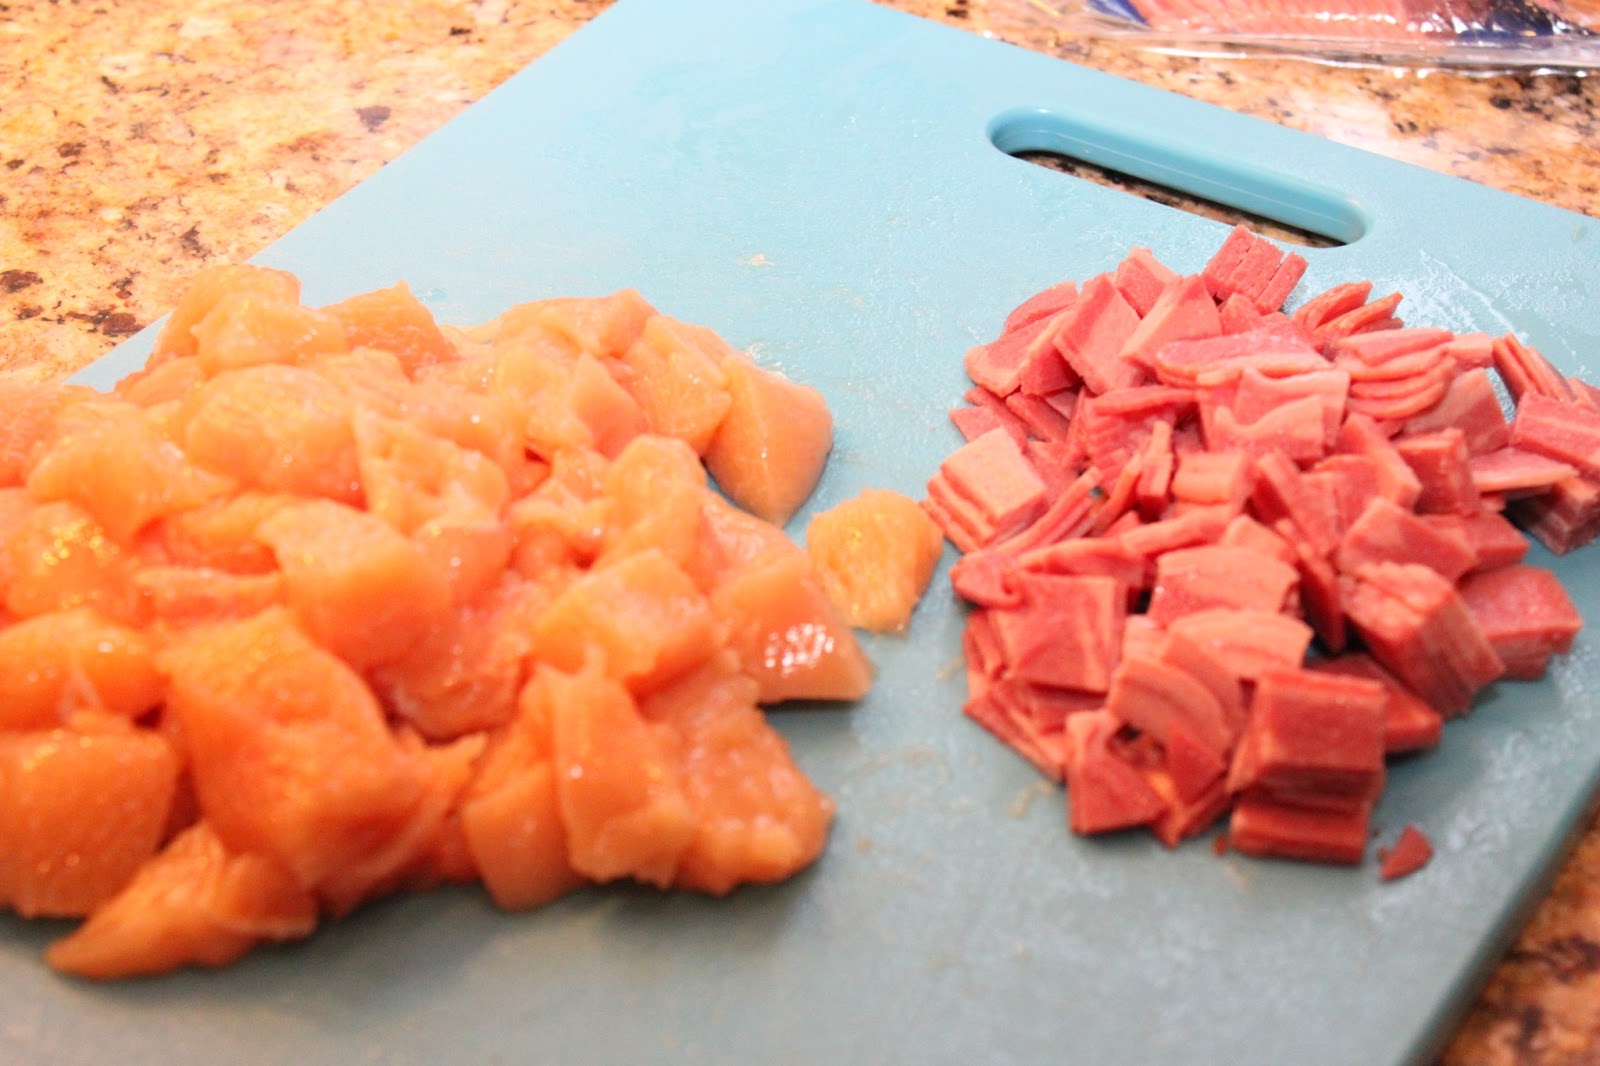
chips (your preferred brand, and desired amount)
1 to 1 ½ chicken breasts, cubed or shredded (I season mine with a little chili powder and cumin while cooking)
Pepperoni, cut into pieces
Ham, cubed
Tostitos Monterrey Jack Queso
1 package Mexican cheese blend
1 jalapeno pepper, sliced
Franks Red Hot sauce

Directions:
Preheat oven to 400 degrees.

In the bottom of a cast iron skillet place a layer of tortilla chips.  Top with some of the Tostitos Monterrey Jack Queso, ½ of the chicken, ham, and pepperoni, desired amount of cheese, and a little Frank’s Red Hot Sauce.  Add on another layer of tortilla chips, and repeat toppings.  Garnish the pizza nachos with some jalapeno slices and place the skillet in the oven for 5-10 minutes, or until the cheese is melted.

Additional toppings might include: black olives, green peppers, sausage, tomatoes, onion, bacon bits, etc.

Source: Inspired by Tasty Kitchen

Monday, July 22, 2013

White Chocolate Peanut Butter Oatmeal Delights


Every so often I get this strong craving for cookies and I have to resist the temptation to give in, especially because cookies are incredibly easy to make and never take too long to bake.  It's just that I've been doing so well lately, with eating healthy and when I bake things, it's incredibly difficult not to give in.......Sadly, I ended up having one, but it was definitely worth it, and in the grand scheme of things isn't the end of the world. 

This particular batch of cookies was made for our road trip, up to the mountains of North Carolina the other weekend.  Somehow though, some of the cookies disappeared before we even left the house, Jeff, *cough, cough*.  Apparently it couldn't be helped though, because these cookies turn out soft and chewy and are the perfect combination of peanut butter and chocolate.     

White Chocolate Peanut Butter Oatmeal Cookies
Printer-Friendly Version

Ingredients:
1 ½ cups all-purpose flour
1 cup old fashioned rolled oats
½ tsp. baking soda
¼ tsp. salt
8 TBSP. butter, melted and cooled
6 TBSP. creamy peanut butter, melted and cooled
1 cup brown sugar
½ cup granulated sugar
1 egg + 1 egg yolk, room temperature
2 tsp. vanilla extract
¾ cup white chocolate chips
½ cup peanut butter morsels

Directions:
Preheat oven to 325 degrees and line a baking pan with parchment paper or a silicone baking mat; set aside.

In a microwave safe dish, combine the peanut butter and butter, then melt together in 30 second intervals until well combined and smooth in texture.  Set aside to cool completely.

In a medium bowl, combine the flour, oats, baking soda, and salt. 

In the bowl of a stand mixer, fitted with the whisk attachment, and set to a medium speed, combine the peanut butter/butter mixture, with the sugars, and then beat until well blended.  Next, add in the egg, egg yolk, and vanilla and beat on a low speed until just blended.  With the mixer kept to a low speed, slowly add in the flour mixture until a dough has formed.  The dough may appear crumbly, but it will eventually come together (If necessary, knead with hands, and add a little milk).  Fold in the white chocolate and peanut butter chips.

Once the dough is ready, shape it into golf ball size pieces and place onto the prepared baking pans about 2 inches apart.  Bake for 10-12 minutes or until the centers appear soft and puffy and the edges are slightly brown.  Remove the pan from the oven and allow to cool on a wire rack for 3-5 minutes, then remove from pan and allow to cool completely on the wire rack.

Enjoy with a tall glass of milk!


Source: How Sweet It Is

Wednesday, July 17, 2013

Cast Iron Skillet Lasagna


For the longest time I've wanted a cast iron skillet, but naturally have been putting off purchasing one.  Recently however, especially after stumbling upon so many delicious looking recipes on line, in addition to using my grandma's cast iron skillet, I finally decided to invest in one of my own.  Looking back now, I can't believe I didn't go out and purchase one sooner. For me, it's definitely been worth the investment and I can't wait to make more delicious meals using it.

So......onto food now.....

I've been meaning to post this recipe for quite some time, but sadly it got buried in my pile of things to post.  In my opinion though, better late then never, and this recipe is definitely worth sharing.  Enjoy!

Cast Iron Skillet Lasagna
Printer-Friendly Version

Ingredients:
1 ½ cans (28 oz) whole peeled tomato, with juices
1 TBSP. olive oil
1 small onion, chopped
½ tsp. salt
¼ tsp. black pepper
3-4 garlic cloves, minced
¼- ½ tsp. crushed red pepper flakes, more if desired
1 tsp. dried Italian seasoning
1-1 ½ lb. Italian sausage, crumbled
10 lasagna noodles, broken into 2 inch sections (I use whole wheat noodles)
1 cup mozzarella cheese, shredded
½ cup Parmesan cheese, grated
¾ cup ricotta cheese (I use part skim)
2 TBSP. fresh basil, minced (optional for garnish)

Directions:
Place the tomatoes, in the bowl of a food processor and pulse until coarsely chopped (or desired consistency is reached).

In a large cast iron skillet, set over a medium heat, add the oil.  Next, add the onion, salt, and some of the black pepper to the pan and sauté until the onion pieces have just had a chance to soften and turn a slight golden color.  This usually takes about 3-5 minutes.  Once that step is complete, add in the garlic, red pepper flakes, and Italian seasoning.  Stir around until just fragrant, about 30 seconds.

Place the Italian sausage into the skillet and occasionally stir around until no longer pink.  Once ready, evenly distribute the lasagna noodle pieces into the skillet and pour on top the chopped tomatoes and their juices.  Increase the heat to a medium high, and let vigorously simmer.  Make sure to stir often, and cook until the noodles are just tender.  This might take between 20-25 minutes.  (Feel free to reduce the heat if necessary to prevent the sauce from cooking over, it just might take a little longer.)

Turn on the broiler. 

Once the pasta is tender, remove the skillet from the stove then add in, and stir around, half of the mozzarella and Parmesan cheese, plus ¼ cup of the ricotta.  Once the cheese has been combined with the pasta, place the rest of the ricotta cheese in spoonful’s that are distributed sporadically across the top of the lasagna.  Sprinkle on the remaining shredded cheeses in an even layer and then place the skillet in the broiler until the cheese begin to bubble and turn a nice golden brown.  This should take about 5 minutes; it cooks quickly, so keep an eye on the dish!  Remove from the oven and garnish with parsley or basil.  Great served with a side salad or garlic bread!

Source: Annie's Eats

Saturday, July 6, 2013

Four-Meat Layer Italian Bake


To me, Italian food is almost as good as Mexican food, especially Italian sandwiches!  I tend to lean towards ordering them whenever I go places like Subway, Firehouse subs, Quiznos, etc.  My all time favorite Italian sandwich though, would have to be the 'Italino' from TGIFriday's.  Sadly though, it was removed from the menu when the restaurant was remodeled, which was years ago.  Thinking about it now, I really haven't been back to a TGIFriday's since.

With how much I enjoy Italian sandwiches, I find it difficult to believe that the thought of making my own sandwich, at home, never really occurred to me, until yesterday.  It all happened because I was playing around online (which I do a lot in the summer) and stumbled across a recipe for an Italian layer bake.  My initial thought was, "Boy! That sure looks delicious!", however, after clicking on the link, and reviewing the recipe, I couldn't help but feel that it was missing some key ingredients.  I immediately came up with an idea, and here's the result......

(If I were making this dish just for me, I probably would have spread a little bit of Italian dressing over the crescent rolls, but Jeff does not like dressing.  Either way, I am making this again!)

Four-Meat Italian Layer Bake
Printer-Friendly Version

Ingredients:
1 (8 oz) tube Pillsbury crescent rolls (I use the low fat)
22 slices Oscar Meyer Honey Ham deli slices
16 slices Oscar Meyer Oven Roasted Turkey deli slices
16 slices deli hard salami
16 slices pepperoni
½ cup Swiss cheese, shredded
1 cup
2/3 cup Parmesan cheese
4 tsp. oregano
2 tsp. parsley flakes
2 tsp. basil
Dash of crushed red pepper flakes
4 eggs, beaten

Directions:
Preheat oven to 350 degrees.

Spray an 8-inch square baking dish with a nonstick cooking spray.  Now, unroll the crescent roll dough without separating the triangles.  Divide the dough into two squares, tearing apart on the precut center line and then press one of the squares onto the bottom of the baking dish, making sure to use your fingers to evenly spread it out. 
 
 
Layer on top of the roll half of the ham, turkey, salami, and pepperoni. 


Top the meat layer with half of each of the cheeses listed, followed by half of the seasonings. 


Pour on half the egg mixture and then repeat the ingredient layers.  Take the final crescent roll square and lay it on top of the second layer of meats and cheeses.  Once again, use your hands to help you spread the roll over the top.  Pour over the remainder of the egg mixture and garnish with some more cheese and seasoning.  (It’s up to you how much and which ones)


Cover the dish with foil and bake for 22-25 minutes.  Remove the foil and bake for another 20 minutes or until cheese is melted and the crescent rolls start to turn a nice golden color.  Once ready, remove from the oven and allow to cool for 5-10 minutes.  Cut, serve, and enjoy!


Source: Adapted from Key Ingredient

Thursday, July 4, 2013

Hawaiian Cauliflower Fried Rice

 
Happy Fourth of July!!!

Personally, I've always been a huge fan of the Fourth!  Not only is it a time to celebrate our country's independence, but it's also a time for fireworks, BBQ's, family, friends, parades, etc.  Growing up I can remember decorating my bike and riding it in parades, setting off those little black, expandable worms in my driveway, writing my name with sparklers, and going over to my grandma's house to watch fireworks over the lake.  Then, when I was a little older, there was a group of us, including Jeff, who would drive from Michigan, all the way down to Tennessee, just to buy our own fireworks to shoot off.  So many good stories come from those Fourth of July festivities!

Flash forward to today though, and I'd have to say that I actually had no holiday plans.  This year I didn't go to a parade, the beach/lake, a BBQ, or even see fireworks.  I did however hear some and still do, even as I'm typing this.  Instead, we chose to celebrate the Fourth of July with just a relaxing day at home, which was nice.  It also gave me time to make this delicious meal, which I'll probably be making again within the next day or so, because it was that good!

Hawaiian Cauliflower Fried Rice
Printer-Friendly Version

Ingredients:
3-4 TBSP. low sodium soy sauce
2-3 tsp. toasted sesame oil
1-2 tsp. Frank’s Red Hot Sauce (more or less, depending on your taste)
1 TBSP. vegetable or canola oil (I used olive oil to make it healthier)
2 cups cooked chicken, cubed or shredded
1 large red bell pepper, seeded and chopped
6 green onions, chopped, and separated (white part from green)
3 garlic cloves, minced
3 tsp. ground ginger
4-5 cups riced cauliflower (I make mine in a food processor)
3 egg whites, scrambled
1-2 cups fresh pineapple pieces

Directions:
In a small bowl, whisk together the soy sauce, sesame oil, and hot sauce; set aside.

Heat about ½ the vegetable/canola/olive oil in a large, nonstick skillet, or wok set over a medium heat.  After about a minute, add in the chicken, red pepper, and the white parts of the green onion.  Sauté the ingredients together until the onion is lightly browned and the red pepper is tender (not mushy, about 3-5 minutes).  Once ready, mix in the garlic and ginger and allow to cook for another 30 seconds to a minute, or until fragrant.  Remove the chicken mixture to a bowl, and set aside.

Place the remainder of the vegetable/canola/olive oil to the skillet or wok and add in the riced cauliflower.  Allow the cauliflower to cook for about 3-5 minutes, or until it becomes soft to the touch and browns a little.  Make sure to move the cauliflower around, to ensure even cooking (I always use a wooden spoon).

Once the cauliflower is ready, add in the chicken, pepper, and onion mixture, the scrambled egg whites, and the prepared sauce.  Stir the ingredients around until everything is evenly distributed and heated through.  Remove the skillet or wok from the heat and then stir in the pineapple pieces and the scallions (green part of the green onion).  Serve warm!


Source: Adapted from Mel's Kitchen Cafe

Wednesday, July 3, 2013

Stuffed Pepper Jack Cheese Meatballs with a Spicy Tomato Sauce


In my opinion, good, old-fashioned, homemade meatballs will always beat pre-made, frozen, store-bought ones any day of the week.  I mostly find my statement to be true because I know that the ingredients are always fresh and not processed and then frozen.  I'm aware that making your own meatballs may be a bit more time consuming then just buying them, but the quality and taste alone, is well worth the effort. 

This particular recipe however, is not your 'grandma's' meatball.  It's actually a meatball with a kick; or as some people might say, 'It's a spicy meat-a-ball.'  So, if you're feeling the desire to stray away from the norm, and get a little 'hot' along the way, then grab a fork because this recipe is a MUST try!

Stuffed Pepper Jack Cheese Meatballs with a Spicy Tomato Sauce
Printer-Friendly Version


Ingredients:
For the Meatballs:
1 lb. Andouille sausage, casting removed
1 lb. Italian Sausage, casting removed
2 cups sourdough bread, torn into bite-size, small pieces
2 eggs, beaten
4 oz. grated Parmesan cheese
1 small onion chopped
3 cloves garlic, minced
4 green onions, minced
½ cup fresh parsley, minced
1 TBSP. creole seasoning
1 TBSP. garlic powder
1 TBSP. oregano
1 TBSP. onion powder
½ tsp. black pepper
Dash of red cayenne pepper
1-8 oz. block of pepper jack cheese, cubed

For the sauce:
2 tsp. olive oil
1 small onion, chopped
3 cloves garlic, minced
1 small can tomato paste
28 oz. tomato sauce
½ lb. lean ground turkey
1 tsp. black pepper
2 tsp. creole seasoning
2 tsp. garlic powder
2 tsp. onion powder
2 tsp. Italian seasoning
2 cups chicken broth

Directions:
For the meatballs:
In a large bowl, add all the ingredients listed, excluding the cheese.  Now, using your hands or a wooden spoon, mix together the ingredients until well combined. 

Once ready, shape the meatballs by rolling them in your hand until desired size is reached.  (Mine fit nicely into the palm of my hand, but were not too large.  If you’re unsure, a ¼ dry measuring cup may help with this step.  Fill the cup with the meat and then roll into a meatball.)  Next, using your thumb, press a hole in the center of the meatball and stuff in a cheese square, and then make sure to recover the hole by pushing the meat back over the top of the cheese.

Place 4 TBSP. of olive oil in a large skillet, over a medium heat and add the meatballs.  Allow the meatballs to brown on all sides and cook through.  Remove from the heat and set aside.  (You may need to complete this in shifts, as all meatballs might not fit into the skillet at once.)

For the Sauce:
In a large sauce pan, over a medium heat, add in 2 tsp. olive oil and sauté the onion until soft and translucent, then add the minced garlic and cook until fragrant, about 30 seconds-1 minute.  After that, add in the ground turkey and cook it until it’s no longer pink and the juices run clear.  Add all the seasonings to the pot and mix well until everything is combined

After the turkey has been coated with the seasonings add in the tomato paste and stir until combined with the meat.  Next, add in the tomato sauce and the chicken broth.  Stir the sauce around until all the ingredients are blended.  After that, allow the mixture to come to a boil and then reduce the heat to medium-low and gently place the meatballs into the pot.  Cover and let cook for 30-40 minutes, making sure to occasionally remove the lid a stir around.
 
 
This meal is great served over pasta, with a slice of garlic bread, and some freshly grated Parmesan cheese!      

Source: Slightly adapted from Creole Contessa

Tuesday, July 2, 2013

Cheesy Chicken with Rice, Bacon, Broccoli and Rotel


I always try to find a recipe over the weekend that will leave at least a few leftovers for the busy week ahead, and casseroles like this one, are fantastic!  Not only was there enough leftover food for a few days worth of lunches, but it also tasted delicious, and I'd have to say that it's pretty healthy!  Especially when it's compared to other casseroles.  Another bonus.....not only is this recipe a time saver (because you don't have to prepare lunches), but it just so happens to contain all my favorite foods in one: cheese, chicken, rice, bacon, and broccoli! 

FYI - I did chose to make a few ingredient substitutions which would make the meal a little spicier.  If you don't like your food to be too spicy, feel free to use original Rotel instead of hot, and you could also choose to omit the chili powder.  Either way you make it, this meal is delicious!

Cheesy Chicken with Rice, Bacon, Broccoli and Rotel
Printer-Friendly Version

Ingredients:
8 slices bacon, diced
2 boneless, skinless chicken breasts, cubed, and seasoned with salt and pepper
1 Tbsp. butter
1 Tbsp. olive oil

1 cup brown rice, cooked according to package directions

1 medium onion, diced
4 cups broccoli florets, chopped into bite size pieces
3-4 cloves garlic, minced
2 cans Ro-Tel diced tomatoes and green chiles (I used Hot)

2 Tbsp. butter
2 Tbsp. flour
1 cup chicken broth
1 cup sharp cheddar cheese, shredded
½ tsp. salt and pepper

Directions:
Place the diced bacon into a large skillet, over a medium high heat and cook until crisp.  Remove the bacon from the skillet and set aside.  Using the same skillet, add the butter, olive oil, and then the chicken pieces.  Allow the chicken to cook, until no longer pink, and the juices run clear.  Remove the pieces from the skillet and set aside with the bacon.


In the same skillet used to cook the chicken and the bacon, add the broccoli and the onion and cook until the broccoli is tender and the onions are caramelized, about 5-10 minutes.  Add in the minced garlic and cook until fragrant.  This should take about 30 seconds.  Top with Ro-Tel, rice, chicken, and bacon, then stir to combine.  Reduce heat to low to keep warm.


In a small sauce pan, over a medium low heat, melt the butter and whisk in the flour until combined.  Next, pour in the chicken broth and whisk together.  Increase the heat to high and cook until the sauce has thickened and begins to bubble.  Make sure to whisk around while cooking.  Once the mixture has thickened, remove the pan from the heat and add in the cheese, salt, and pepper.  Stir until the cheese is melted, then pour the mixture into the skillet with the rest of the ingredients.  Stir together and serve!

Source: Adapted from Kevin and Amanda