RSS

Saturday, January 28, 2012

Banana Chocolate Coconut Granola


Lately I've been eating lots of granola, with my favorite brand being Heartland Original! 

I know that there are many different ways one can enjoy granola, but my personal preference is adding it into some of my Chobani non-fat vanilla Greek Yogurt. 

Sadly, the store I typically buy my groceries from, has recently been all out of Heartland Granola.  Apparently it's the most popular.  Needless to say, I continued to check back every couple of days, but have had no success. 

This lack of granola prompted me to think creatively.  I mean, how hard could granola be to actually make myself?  Well, the answer to that question was quite simple.  Literally.  Not only did it appear to be easy, but it didn't seem that it would take much time either. 

I discovered that I already had the majority of the ingredients on-hand and after I purchased the rest, the process went quite quickly.  Another nice thing about making your own granola is that you can add or subtract many different ingredients, which really helps to make it your own.

I already find that I have so many new and great ideas for different flavors of granola that I want to try!

Banana Chocolate Coconut Granola
Printer-Friendly Version

Ingredients:
2 cups shredded coconut (sweetened or unsweetened)
2/3 cups walnuts, chopped
2/3 cups almonds, chopped
6 cups, rolled oats
6 Tbsp. canola oil
¾ to 1 cup honey
¼ ground flaxseed, optional
1 ¼ tsp. cinnamon
½ tsp. salt
1 cup dried bananas
4 oz. bittersweet chocolate, coarsely chopped
4 oz. white chocolate chips

Directions:
Preheat the oven to 325 degrees and line a baking sheet with a silicone baking mat or a piece of parchment paper.

Place a large skillet over medium heat.  Once warm, add in the shredded coconut and spread around into an even layer, making sure to just cover the bottom of the skillet.  Continue to stir around until the pieces are lightly brown and nicely toasted.  Transfer the toasted coconut pieces into a bowl and wipe out the skillet.  Return the skillet to the stove and add in the walnuts and almonds.  Continue stirring the walnuts and almonds until they are lightly brown, this will take about 4-8 minutes.  Once the nuts are done, stir in the oats and the canola oil.  Continue stirring until the oats are lightly toasted and everything is mixed together.  This may take 3-6 minutes.

Transfer the oat mixture into a large bowl and add in the honey, ground flaxseed, cinnamon, and salt.  Using a wooden spoon, stir the ingredients together until everything is well combined.  Evenly spread out the granola mixture onto the prepared pan and place in the oven for 15 minutes, or until the granola starts to turn a nice light brown.  It’s important to make sure that you stir the granola around every few minutes, while it’s baking, so that the edges don’t burn.

Once the granola is done baking, add in the dried bananas and coconut, and stir around to combine.  Push the granola to one side of the baking pan and press down to form one large piece.  Let cool to room temperature.  Break the cooked and cooled granola into small chunks and mix in the chocolate.  Store in an airtight container. 

Source: Adapted from Annie’s Eats

Wednesday, January 25, 2012

Snickers Cupcakes with a Caramel Buttercream Frosting


Recently at school I held a group competition, hoping that it would motivate my students to slow down and really focus on their reading and comprehension.  Each day the groups were assigned to read a short passage and then, working together, they'd have to answer a set of questions.  For the competition, each group would have to come to a consensus for every answer (which can be very difficult for sixth graders), and if one or two of the group members disagreed, they'd have to explain to their other group members why they thought it was something else, making sure to use support from the text.

During these types of activities, I find it very encouraging to walk around the room and listen to students' justify their answers to their peers.  Sometimes it'd be only one student in the group who had the correct answer and I loved it when they didn't give up just because everyone else in the group may have disagreed with them.  I knew from the start that this task would require some serious effort, therefore, I promised the group with the highest score, at the end of the competition, that I'd bring them in a "special" treat.  By this point in the school year, my students know how much I love to bake, and are always asking me to bring in things.  Due to this, I thought it might be good motivation for them to try hard. 

I decided right away that I'd make cupcakes for the winning groups!  I didn't want to make just any plain old cupcake though, it needed to be special for all their hard work.  Here's the result!!!  Be prepared for these to go quickly!

Snickers Cupcakes with a Caramel Buttercream Frosting
Printer-Friendly Version

Servings: About 20-24
For the cupcakes:
½ cup Dutch-process cocoa powder
½ cup hot water
2 cups all-purpose flour
¾ tsp. baking soda
¾ tsp. baking powder
¾ tsp. coarse salt
16 Tbsp. unsalted butter
1½ cups sugar
2 large eggs plus 1 egg yolk
1¾ tsp. vanilla extract
2/3 cup sour cream, at room temperature

For the caramel sauce:
8 Tbsp. butter, cut into pieces
1 cup sugar
1 cup heavy cream
¼ tsp. vanilla extract
Pinch of salt

For the filling:
18-22 fun-size Snickers bars, chopped

For the frosting:
16 Tbsp. butter, at room temperature
1 lb. confectioners’ sugar
1½ tsp. vanilla extract
1/4 cup caramel sauce
Pinch of coarse salt
2 Tbsp. Sugar Free Smucker’s Caramel Syrup
2 Tbsp. heavy cream

For garnish:
8 fun-size Snickers bars, chopped

Directions:
To make the cupcakes:
Preheat oven to 350 degrees and line standard cupcake pans with cupcake liners.  Set aside.

In a small bowl combine the cocoa powder and the hot water then whisk together until smooth.  Set aside.  In a medium bowl combine the flour, baking soda, baking powder, and salt.  Whisk together and then set aside.

Combine the butter and sugar in a medium size sauce pan, over medium heat.  Make sure to occasionally stir the two ingredients together until the butter is melted.  Once ready, pour the mixture into the bowl of an electric mixer and beat on a medium-low speed until it begins to cool.  This could take 4-8 minutes.  Beat in the eggs and egg yolk, one at a time, making sure to beat well after each addition.  Next, add in the vanilla and the cocoa mixture and beat until well incorporated.  Working in two batches, and with the mixer set to a low speed, slowly add in the flour mixture making sure to alternate with the sour cream, until just combined.

Pour the batter evenly into the prepared cupcake liners, filling them about ¾ of the way full.  Bake for 18-20 minutes or until an inserted toothpick comes out clean.  Make sure to rotate the pans halfway through baking.  Cool the cupcakes on a wire rack and in the pan for 5 minutes, then remove the cupcakes from the pan and let cool completely.

To make the Caramel Sauce:
In a heavy bottom sauce pan, set on a low-medium heat, melt together the butter and sugar.  Do not stir around, but let the ingredients slowly melt together until they start to bubble.  The mixture should look a little greasy and separated and should be beginning to caramelize.  Let cook for another 5-9 minutes, or until the mixture begins to look even more like caramel.  Slowly add in the heavy cream, a little at a time, while whisking continuously.  Remove the pan from the heat, and stir in the vanilla and salt.  *Do not pour in the heavy cream all at once, because it will really begin to boil.* Making this sauce is a slow process, so be patient.  Let it cool.

To fill the cupcakes, cut a cone shape out of the top of the cupcakes, using a small knife and cutting at an angle.

To make the Filling and Fill the Cupcakes:
Place the chopped Snickers pieces in a small bowl with 1/3 cup of the caramel sauce, 1 Tbsp. Smucker’s caramel syrup and mix to combine.  Drop the coated Snickers pieces into the holes at the top of the cupcakes.


To make the Frosting:
In the bowl of an electric mixer, add the butter and beat on a medium speed for 1 minute, or until smooth.  Add in the powdered sugar and beat on a low speed until blended.  Mix in the vanilla, caramel sauce, Smucker’s caramel syrup, and salt until just combined.  (Make sure that the caramel sauce is not hot, so as not to melt the butter in the frosting)  Pour in the heavy cream and beat on a high speed until light and fluffy.  This might take a minute or two.

Place the frosting into a pastry bag that’s prepared with a decorative tip and pipe it on top the cupcakes.  Garnish with extra snickers pieces, and drizzle with the caramel sauce. 


Source: Slightly adapted from Annies Eats

Friday, January 20, 2012

Chicken & Edamame with Brown Rice & Topped with an Orange-Citrus Dressing


If you're looking for a quick and healthy dinner, then stop right here!  You've found it!

Not only was this dish seriously delicious, but I was also able to have it prepared and on the dinner table in about 30 minutes.  It was wonderful!  I could have saved even more time by pre-grilling the chicken and then rewarming it in the microwave when I was ready. 

Another recipe bonus is that it makes more than enough!  This way you can pack it up and take it to work with you for some extra healthy lunches.

Chicken & Edamame with Brown Rice & Topped with an Orange-Citrus Dressing
Printer-Friendly Version

Ingredients:
¼ cup orange juice (may use freshly squeezed)
2 Tbsp. lime juice
1 Tbsp. canola oil
1 Tbsp. peeled and grated fresh ginger
Salt
2 grilled chicken breasts, sliced/diced
1 cup shelled edamame
1 large red bell pepper, diced
A small handful of cilantro, chopped (for garnish)
1 cup brown rice

Directions:
Cook the brown rice according to package directions.

In a medium bowl, add in the orange juice, lime juice, canola oil, and ginger.  Whisk until combined.  Sprinkle in salt to liking.  Next, add in the chicken, edamame, and bell pepper, and stir around until well coated.

Lastly, spoon the mixture over the bed of brown rice and garnish with cilantro.

Source: Slightly adapted from Confections of a Foodie Bride


Wednesday, January 18, 2012

Peanut Butter Banana Bread with Mini Reese's Peanut Butter Cups

Lately I've been going a little crazy with my recipes.  Ok, not really so much crazy, but rather having fun experimenting with some of my favorite foods. 


A few weeks ago, a neighbor of mine gave birth to an adorable baby boy named Landon, and ever since then I've been wanting to go over and visit with her.  Things have just been very busy for me lately and I knew that when I went, I couldn't go empty handed.

This past Monday happened to be a holiday for me though, so I immediately planned my visit and began thinking about what I could take with me.  I went back and fourth between, cookies, cakes, pasta dishes, etc.  I'm not really sure why, but I was having a difficult time deciding.  I just had so many great sounding recipes pouring through my mind that I wanted to make them all.

That's when I remembered that she was a fan of the chocolate/peanut butter combination, just like me!  Now that I had it narrowed down a little further, I continued to think......cupcakes.....muffins.....bread.  Yes!!!  That was it!!  Bread.  Bread kept popping into my mind.  Not just any bread though, if she was really like me in her tastes, then she'd most likely like banana bread.  I'm not just talking about any plain old banana bread though, banana bread with peanut butter and mini Reese's Peanut Butter Cups!!!  How could it get any better than that???

The only thing I might do differently the next time I make this, is melt some chocolate to drizzle on top.  YUM!!!!

Peanut Butter Banana Bread with Mini Reese’s Peanut Butter Cups
Printer-Friendly Version

Ingredients:
3 very ripe bananas, mashed
½ cup creamy peanut butter
¼ cup vegetable oil or unsweetened applesauce
1 egg
½ cup sugar
¼ cup brown sugar, packed
1 ½ cups all purpose flour
½ tsp. baking soda
1 ½ tsp. baking powder
½ tsp. salt
8 oz. bag of mini Reese’s Peanut Butter Cups

Directions:
Preheat oven to 350 degrees and spray a loaf pan with non-stick cooking spray, such as PAM.  Set aside.

In a medium bowl, combine the flour, baking soda, baking powder, and salt.  Whisk together and then set aside.

In a large bowl, add in the bananas, peanut butter, oil (or applesauce), egg, and sugars.
 

Stir together until everything is well blended and smooth.


Pour the flour mixture into the peanut butter banana mixture and stir until just combined.  The batter should appear lumpy.

Gently fold in the mini Reese’s Peanut Butter Cups.......


then pour the batter into the prepared loaf pan.  You may need to use a spoon or a spatula to evenly spread the batter around.

Bake for 45 minutes to 1 hour.  Check to make sure the bread is done by inserting a knife or toothpick into the middle.  If the device comes out clean, than you know the bread is done. 

Remove the pan from the oven and let cool on a wire rack for 10-15 minutes.  After that, gently run a knife along the edge of the pan.  This will help loosen the bread so that it may easily be removed.  Place the bread back on the wire rack until it’s had the chance to complete cool.

Serve with a big glass of milk and enjoy!!!

FYI:  If the top of the bread seems to be browning too quickly then turn the oven temperature down to 325 degrees.

Source: Slightly adapted from Cookies and Cups

Tuesday, January 17, 2012

Buffalo Chicken and Jalapeno Popper Mac & Cheese

This meal is bananas.....B-A-N-A-N-A-S!!!!!!!!  This meal is bananas!!!!!!!!!!!  (FYI, there really are no banana's involved in this recipe, they'll be appearing in one of my next posts)

Anyway......time for me to regain focus and get back on topic.  So here goes..... 

This meal just so happens to call for pretty much every flavor I love, all tossed into one heavenly dish.  I honestly don't even think there's a word good enough to describe how absolutely delicious it is/was. 

Truth be told; I was actually planning to avoid the temptation of this meal and not even have a bite. The dinner was strictly going to be for my husband, but seriously......who was I kidding?  The meal contained everything that "I" loved, so how could I possibly avoid it? 

Be warned though.......you may go back for seconds, or even thirds.......who knows, maybe even fourths!!


Buffalo Chicken and Jalapeno Popper Mac & Cheese
Printer-Friendly Version

Ingredients:
4 slices of bacon
2 Tbsp. bacon grease, reserved from bacon
1 cup onion, chopped
2 jalapenos, sliced, ribs and seeds removed
1 pound elbow macaroni

For the sauce-
4 Tbsp. butter
5 Tbsp. all purpose flour
2 cups milk (I used skim)

1/4 cup heavy cream
salt & pepper, to taste
1 pinch nutmeg
2 ounces cream cheese
¼ cup hot sauce, I use Original Frank’s Red Hot

2 1/2 cups grated cheddar cheese
1 cup grated mozzarella cheese
1/4 cup grated provolone
1/4 cup blue cheese crumbles
2 cups precooked and shredded chicken, optional

For the topping-
1 cup crackers or corn flakes, crushed (your choice)
1/3 cup blue cheese crumbles
cooked bacon crumbles, as listed above

Directions:
Preheat the oven to 350 degrees and spray a 9x13” baking dish with PAM, or any other cooking spray.  Set aside.

In a medium skillet, fry the bacon until crispy, then remove to a plate lined with paper towel, and pat the bacon dry; this will remove any unwanted grease.  Pour out the excess grease from the pan, making sure that you leave about 2 Tbsp.  Now, place the skillet back over the heat and add in the onions and jalapeno peppers.  Saute together until tender.  This will take about 3-6 minutes over a medium heat.

Fill a large pot ¾ of the way full with water and bring to a boil.  Sprinkle in some salt and pour in the pasta. Cook until the pasta is very al dente, but not still crunchy.  This may require you to sample it throughout the cooking process.  Drain and set aside.

Using the same pot the pasta was in; melt the butter over a medium heat.  Whisk in the flour and let cook for 1 minute.  Pour in the milk, cream, salt, pepper, and nutmeg, then whisk together until well combined.  Turn the heat up to medium high and continue whisking the mixture around until the sauce begins to thicken.  This will take you a few minutes, but once the mixture has thickened enough, immediately remove it from the heat.  Next, add in the cream cheese and hot sauce then stir around until the cheese has melted and the mixture appears smooth in texture.  Pour the pasta, sauted onions and jalapeno peppers into the sauce and stir around until everything is well coated.  Now it’s time to add in all the cheeses and the chicken.  Once again, be sure to stir the ingredients around until everything is well combined.  (If you must…….go ahead and sample a small bite, just to make sure it’s seasoned the way you want it)  Lastly, pour the mixture into the prepared baking dish, and spread out evenly.  Top with some blue cheese crumbles, pieces of bacon, and crushed up crackers or cornflakes.  Bake for 20-25 minutes, or until the top starts to turn a nice golden color.  Remove the dish from the oven and top with some fresh parsley.  Bon appetite!!!    

Source:  Adapted from Lauren's Latest


Sunday, January 15, 2012

Spicy Jack Daniel's BBQ Sliders


When it comes to dinner, my poor husband, Jeff, has been having to fend for himself for the past couple of days.  You see, unlike me, Jeff doesn't care for the "healthier" food.  In fact, he tends to make fun of it by calling it, "rabbit food."  In his eyes, "it's the stuff rabbit's eat," so he won't.  After watching him for a few evenings now, warm up frozen pizza after frozen pizza, (I shutter at the thought, but he doesn't mind), in addition to some other frozen dinners, I finally decided that it was enough.  Jeff needed a real manly meal, so I set to work.  Here's the end result.......a number of delicious mini burgers that he'd be able to enjoy for a few days.

Spicy Jack Daniel’s BBQ Sliders
Printer-Friendly Version

Makes 12 sliders
Ingredients:
2 lb. lean ground beef (or meat of your choice)
Salt and Pepper
4 Tbsp. butter
1 medium onion, chopped
½ cup Jack Daniel’s Whiskey
1 cup Original Jack Daniel’s BBQ sauce (or your choice)
3 large jalapeno peppers, seeded and sliced (or more if you like)
12 whole slider buns, or dinner rolls

Directions:
Form the beef into 12 small, round patties and sprinkle on the salt and pepper until desired amount is reached.

Melt the butter in a large skillet over medium-high heat and cook the patties until the center is no longer pink.  4-8 minutes on each side, but could be longer depending on heat source. 


Remove the patties to a plate, cover with aluminum foil, and set aside.  Drain the skillet, except for about 2 Tbsp. of the grease/butter mixture and then return to the burner. 

Add in the chopped onions and sauté for about 3 minutes, while stirring. 


Carefully pour in the whiskey (if you have a gas stove, you might want to turn it off while pouring, and turn it back on when done). 


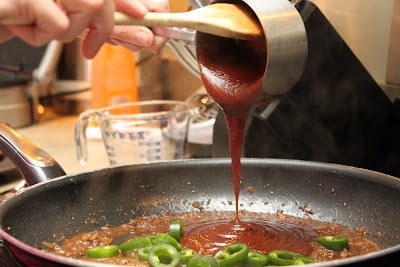
Stir around until the whiskey has reduced by half, this will take a few minutes.  Now add in the jalapeno peppers and the BBQ sauce. 


Stir around until all the ingredients are well combined and a nice aroma fills your kitchen.

Reduce the heat to low and place back in the beef patties, turning to coat each side with the spicy Jack Daniel’s BBQ mixture.  Allow the patties to simmer in the sauce until it starts to bubble.


Remove the skillet from the heat and place the patties onto the prepared slider buns.  Be sure to garnish with a slice or two of the jalapeno pepper and spoon on some extra sauce!


*To prepare the sliders* You could just serve them as is, but I decided to place mine on a griddle, with a little slice of butter, in order to toast.

Source: Slightly adapted from The Pioneer Woman Cooks

Friday, January 13, 2012

Crescent Roll Rounds topped with a Creamy Ranch Dip and Veggies


This recipe is one of my favorite appetizers to make because of how quick and easy it is.  Most of the items can be prepared a day or so ahead of time, and then placed together at the last second.  I also like that you can choose to make it healthier by substituting low fat, or reduced calorie options; which I always do.  You can also choose to replace the vegetable choices with some that you may like better, but I think the vegetables in the recipe are great as is.  I recently served these mini treats at a party I hosted, and they were a big hit!  I hope that you enjoy!

Crescent Roll Rounds topped with a Creamy Ranch Dip and Veggies
Printer-Friendly Version

Makes 16-24
Ingredients:
2 tubes (8 oz. each) crescent rolls (I use reduced fat)
1 package (8 oz.) cream cheese (I use 1/3 less fat, fat free is not flavorful at all), softened
½ cup reduced fat sour cream
1 packet original hidden valley ranch
1/8 tsp. garlic powder
½ cup – 1 cup broccoli florets, chopped
¼ cup red bell pepper, chopped                                              
¼ - ½ cup green bell pepper, chopped

Directions:
Preheat oven to 375 degrees.

Remove the crescent dough from its’ packaging, making sure not to unroll.  Cut each tube into 8-12 slices, depending on your preference of thickness.  Place slices on an un-greased baking pan and bake for 13-18 minutes, or until lightly golden.  Remove pan from the oven and transfer the crescents onto a wire rack for cooling.  Allow to cool completely.

In a small bowl, and with a hand held mixer, beat the cream cheese, sour cream, ranch packet, and garlic powder until well combined.  (You could make this mixture a day ahead of time and store it, covered, in the refrigerator over night.)  Transfer the creamy ranch mixture into a pastry bag and gently pipe it onto the tops of the crescent rounds.  If you don’t have a pastry bag, its ok, just use a knife and spread the mixture on top of the rounds.

Now, garnish with some of the broccoli, red peppers, and green peppers.  (I chopped the vegetables up a day ahead of time, so that they were ready to go.)  Feel free to display this appetizer however you would like.

Adapted from Taste of Home


Wednesday, January 11, 2012

Chicken and Vegetable Spring Roll Wraps


Let me start this post off with one word, FAN-TAS-TIC!!!

Up until I made this savory dinner, I'd never tasted a spring roll and really couldn't even tell you why. It's definitely a food I've been wanting to try for awhile now, because they always look so healthy and tasty, but for some reason it was always pushed out of my mind when it came time to create my weekly dinner menu. This time however, because I've been trying to eat healthier, I remembered them and am really glad I did!

At first sight I was a little worried because I thought the wraps might be difficult to assemble, but they were actually very easy. However, I did have to go to 2 stores before I managed to find spring roll skins, but in the end it was worth the inconvenience.  Be warned.....this recipe is completely addicting and very filling!!!  I already find myself wanting to make it again and again, but I also want to try stuffing the remaining spring roll skins with different food items, therefore creating new recipes.

Chicken and Vegetable Spring Roll Wraps
Printer-Friendly Version

Serves: As many as you like
Ingredients:
Spring roll (rice paper) wrappers
Chunks of chicken (or turkey)
Soy sauce
White wine vinegar
Sesame oil
Chopped cilantro
Finely diced carrots
Strips of cucumber
Baby spinach or other leafy lettuce
Cellophane noodles

Directions:
Prepare the cellophane noodles and spring roll wrappers according to package directions.

In a small or medium bowl, mix together the chunks of chicken with soy sauce, white wine vinegar, sesame oil, minced carrots, and chopped cilantro.  Taste until seasoned the way you would like.  (I added in more soy sauce)

Lay prepared spring roll wrappers on a flat surface and then add in the cooked noodles, spinach, cucumber strips, and chicken mixture.  Roll up, and serve with a dipping sauce of your choice.

Here are some of the ingredients that you'll need for this recipe.  *make sure to cut the cucumbers sticking to the perimeter and away from the softer interior.*
Place the cellophane noodles in a bowl of warm water until they turn soft.  I only put in one bushel, instead of the whole package, seeing the dinner was just for me.
Mix up the chicken, sauces, carrots, and cilantro.  Next time I will definitely add in more cilantro.
After you lay the spring roll flat, add on a little of the cellophane noodles, spinach, and cucumbers.
Top with some of the chicken mixture.  To roll: I folded the two ends toward the middle and then started rolling from one side to the other.

Source: Adapted from The Pioneer Woman Cooks

Monday, January 9, 2012

Quick and Easy Egg Roll Soup


Well it's official.....I'm "insane".  In other words, I decided to begin the "Insanity" workout program today and it kicked my butt.  I thought that I was already in good shape, but the program had me working muscles I didn't even know I had.  In addition to starting "Insanity", I decided I wanted to resume eating healthier foods.  I use to be really good about it, but as time went on, old habits began to resurface.  Due to this personal goal, you'll most likely be seeing more healthy recipes, like this one, appear.  Promise not to freak out though, because not everything that I share with you on my blog will become completely healthy.  My husband still needs to eat too and no matter how hard I might try, I really just can't give up making tasty desserts for friends, family, and students!

Quick and Easy Egg Roll Soup
Printer-Friendly Version

Makes 4-5 servings
Ingredients:
2 Tbsp. olive oil
½ a yellow onion, chopped or diced
3 cloves garlic, minced
2 cups shredded cabbage
½ cup carrots, julienne
4 cups chicken broth (I use fat free or reduced sodium)
2 cups shredded chicken or pork
1 tsp. ground ginger
3 tsp. soy sauce (I use reduced sodium)
½ tsp. toasted sesame oil
salt and pepper to taste
Egg roll wrappers (for garnish)

Directions:
Place the olive oil in a medium to large pot, over a medium-high heat.  Add in the onion and sauté for 5 minutes, or until the onions appear translucent.  Be sure to stir occasionally.  Now, add in the garlic and stir for another minute or so.  Pour in the cabbage, carrots, chicken broth, chicken or pork, and ginger; then bring the ingredients to a gentle boil.  Reduce the heat to medium-low and let the soup simmer, uncovered, for 10-15 minutes.  With about one minute left, add in the soy sauce, sesame oil, salt, and pepper.  Stir all the ingredients together until combined.

Remove the soup from heat and serve immediately.  Be sure to garnish the soup with broken up chunks of an egg roll shell for a more authentic egg roll experience.

*You may always follow the cooking directions that are provided on the package of the egg roll wrappers, but I opted for the healthiest way, which was to bake them.  In order to do this I preheated my oven to 400 degrees and then I placed an egg roll wrapper on a pan that I had sprayed with Pam.  After that I lightly coated both sides of the individual egg roll wrapper with olive oil and then placed in the oven for 4-7 minutes.  Keep your eye on the wrapper, because it can burn quickly.  Once it reaches a nice golden brown color, remove from the oven and let cool for about 1 minute.  Crumble up and place on top of the soup for garnish.* 

P.S.- Feel free to use any type of shredded chicken or pork for this dish.  Just be sure that it's cooked first.  I was short on time, so I actually used canned chicken myself and it turned out great!     

Source: Adapted from Gimme Some Oven

Wednesday, January 4, 2012

Bailey's Chocolate Oreo Cheesecakes with Marshmallow Fluff Vodka


So I'm well aware that the holiday's are officially over, meaning that the tree has come down and all the decorations have been nicely packed away.  Due to recent travels though, I'm a little behind with my posts and if not for these mini cheesecakes, I really would just say ok, it's time to move on from the holidays and the desserts.  However, after I sampled a bite of these mini delights, I immediately knew the recipe was one that needed to be shared with all of you!  I strongly feel that if you read over the ingredients you'll see that they pretty much speak for themselves as to the deliciousness that's in store.  My recommendation is to make these ASAP!!! because I'm not really sure if the Marshmallow Fluff Vodka (Smirnoff) is a seasonal flavor or not.  Oh no.....that means that I'd better head over to the "Alphabet Store" (ABC liquor) myself and stock up!

Bailey's Chocolate Oreo Cheesecakes with Marshmallow Fluff Vodka
Printer-Friendly Version

Ingredients:
For the Crust:
15 whole Oreos (you may need more/less)

For the Cheesecake:
2 packages cream cheese (softened)
3/4 cup sugar
3 Tbsp. unsweetened cocoa powder
2 Tbsp. all purpose flour
2 large eggs, room temperature
3 Tbsp. Bailey’s Irish Cream
1 Tbsp. Smirnoff’s Marshmallow Fluff Vodka
1/3 cup sour cream

For the Chocolate Glaze:
2 ounces semi sweet chocolate chips
1/4 cup heavy whipping cream

Directions:
Preheat oven to 300 degrees and line a cupcake pan with cupcake liners.  Place one whole Oreo cookie on the bottom of each liner.


In the bowl of an electric mixer, set to a medium speed, and fitted with the paddle attachment, beat together the softened cream cheese, sugar, unsweetened cocoa powder, and the flour.  Once combined, add in the eggs, one at a time, and beating well after each addition.

Pour in the Bailey’s Irish Cream and Marshmallow Fluff vodka and beat on a low speed until just combined.  Then, add in the sour cream and beat one last time until everything has a smooth texture and is well blended.

Using an ice cream scooper, or a large spoon, scoop the cheesecake batter on top of the Oreo’s.  If needed, spread the cheesecake batter around.


Bake the cheesecakes for 20-25 minutes or until the cheesecakes are set.  Once the cheesecakes are done, cool them on a wire rack for 10-20 minutes, and then place them in the refrigerator overnight.  Leave them in the pan. 

The next day:
Once the cheesecakes are set, it’s time to make the chocolate glaze.

Place the chocolate chips in a small bowl.  Pour the heavy whipping cream into a small saucepan and bring to a boil.  Immediately remove the pan from the heat, and pour the heavy cream over the chocolate chips.  Allow to sit for 30-50 seconds and then whisk together until smooth.  Let the chocolate cool for just a few minutes, or until desired consistency is reached and then spoon the glaze over the cheesecakes.  Feel free to garnish with some chopped up Oreo pieces!


Source: Adapted from Gingerbread Bagels

Sunday, January 1, 2012

Peppermint Bark Chocolate Cookie Sandwiches


Goodbye 2011, hello 2012!!! 

Today marks the start of a new year in which the possibilities are endless.  To me, January 1st is always a little bittersweet.  People always say that it's a fresh start, which is true, but I also like to look back and reflect on the year that we all just said good-bye to.  For most people, each year's full of sad and happy memories, and I think that today should be a time to be thankful for the things throughout the year that've passed us by.  True, I may have faced my share of difficult times in 2011, but I also had many wonderful things happen in my life as well.  Here are just a few that clearly stand out; I was fortunate enough to have the chance to cruise around on the "Disney Dream" before it opened to the public, I was able to visit family and friends in Michigan,  many family and friends made it down here to visit us in North Carolina, I turned the big 3-0, I started my very own food blog, my husband and I went on our annual whitewater rafting trip with friends, I made my first wedding cake/cupcakes, and I was able to spend Christmas with my husband and family out in Las Vegas.  With all the great memories created in 2011, I'm really looking forward to what 2012 brings!!!

One thing that helped us kick off the new year last night, were these delicious chocolately peppermint bark cookies.  Oh...my.....goodness.....were they ever fantastic!  I'm not even really a big fan of peppermint, but throughout the evening the cookies just kept calling my name.  Finally, I gave into temptation and sampled one.  I told myself that it was ok though, because I finished the cookie before the clock struck midnight.  Therefore, I did not ruin my New Year's resolution....................... 

Who am I kidding though, with all the desserts I make throughout the year, my New Year's resolution could never be to give up baked goods!  How else would I know if I could serve what I make?  That sounds like a valid reason, right?  Anyway.......I 'm sure that some of your New Year's resolutions are to eat healthy and exercise, which mine are as well, but every now and then I feel that we need to reward ourselves for all our hard work.  So, with that being said, here's the recipe for when you're in the mood to say, "To heck with the diet for a day!"


 Peppermint Bark Chocolate Cookie Sandwiches
Printer-Friendly Version

Ingredients:
For the cookies:
2 cups all-purpose flour
3/4 cup unsweetened cocoa powder
3/4 tsp. baking soda
1/2 tsp. kosher salt
1 cup butter, softened
1 cup granulated sugar
1/2 cup light brown sugar, packed
2 large eggs, room temperature
1 Tbsp. vanilla extract
1 package Andes Peppermint Crunch, broken into smaller pieces (feel free though, to use any peppermint bark)

For the frosting:
3 cups confectioner’s sugar, sifted
1/2 cup unsalted butter, melted
2/3 cup unsweetened cocoa powder
1 tsp. peppermint extract
1/2 tsp. vanilla extract
1/3 cup half-n-half

Directions:
For the Cookies:


Break the peppermint crunch into smaller pieces, using your hands.  This will prevent you from breaking the pieces too small. 


Place the pieces in a small bowl and place in the freezer for 30 minutes.  This helps the bark from melting too quickly while baking.

In a medium bowl, sift together the flour, cocoa powder, baking soda, and salt.  Set aside.

In the bowl of an electric mixer, set to a medium speed, beat the butter for about 3 minutes, scraping down the sides as needed.  Add in the brown sugar and sugar and continue to beat on a medium speed until light and fluffy.  This should take around 4 minutes.  Add in the eggs, one at a time, making sure to beat well after each addition.  Add in the vanilla and mix on a low speed until just combined.

Pour in the flour mixture and beat on low until all the ingredients are just combined.  Continue by folding in any ingredients that may have stuck to the sides or the bottom of the mixer’s bowl.  Add the peppermint crunch (bark) to the cookie dough and fold in using a spatula.

Cover the mixing bowl and refrigerate for 1-2 hours, or longer.  Do not skip this step, or try to rush it!!!

Once the cookies have been chilled, line a baking sheet with a silicone baking mat, or a piece of parchment paper and preheat the oven to 350 degrees.

Using a cookie scoop, scoop out a piece of cookie dough and then roll it into a small ball. 


Place the balls onto the prepared baking sheets and flatten slightly, using the palm of your hand.  Bake in the oven for 10 minutes.


Allow the cookies to cool in the pan for 3-5 minutes and then transfer to a wire rack to cool completely. 

For the Frosting:
Sift the powdered sugar and set aside.

Place the melted butter into the bowl of an electric mixer, fitted with the paddle attachment, and sift the cocoa powder over top.  Mix on a medium speed for about 4 minutes, or until the mixture becomes smooth.  Now, add in the peppermint extract and the vanilla extract and mix until just combined.

With the mixer set to a low speed, alternate between adding the confectioner’s sugar and the half-n-half.  Once the ingredients have been combined, increase the speed to medium-high and beat for about 2-3 minutes or until the frosting appears smooth.

To make the cookie sandwiches:
  1. Match up even size cookies. 
  2. Fill a pastry bag with the frosting and a decorative tip.
  3. Place a cookie upside down
  4. Pipe frosting on the inverted cookie
  5. Top with another cookie
  6. Try not to eat right away, but if you do, ENJOY!!!!


To Store:  Place the cookies in an airtight container and store them in the refrigerator.  Remove the cookies from the refrigerator at least 20 minutes before eating.