RSS
Showing posts with label Pizza. Show all posts

Tuesday, February 4, 2014

Mexican Pizza with a Cauliflower Crust


I know I've said in the past that I'm not really fan of pizza, and that I can't even remember the last time I ordered it from a restaurant, and all that's true.  Still, I have to admit that I've been kind of curious about, and have been really wanting to make a cauliflower pizza crust.  Its just that I've been seeing so many recipes on Pinterest for cauliflower pizza crusts, breadsticks, calzones, etc. and I've ended up pinning a bunch of different versions due to the fact that each one looks absolutely scrumptious!

Now that I've actually made it, let me just tell you that my predictions were 100% correct.  This pizza crust was so incredibly delicious!

The reason I always tend to avoid pizza is because of all the empty carbohydrates that are found in the crust.  However, by choosing to make the pizzas myself and substituting cauliflower for the crust, instead of using traditional flour, I knew that it would be healthier and was therefore willing to eat it.

This recipe actually makes 2 small, round pizzas.  Each pizza, depending on how much cheese you put on it, is between 450-500 calories.  And that's for the whole pizza, which is very filling!  Keeping that in mind, think of how many calories are in an average Lean Cuisine meal, and that's something that comes frozen.  This pizza is completely fresh.  Not only that, but there are only about 25 grams of carbohydrates and around 47 grams of protein.  Once again, that's in the whole pizza, and you don't have to eat it all at once, unless of course you want to!

It's always nice when you can make a comfort food healthy!

Sorry that the pictures of this meal may not be my best, but I promise that it's delicious!

Mexican Pizza with a Cauliflower Crust

Ingredients:
For the Crust:
1 head of cauliflower
¼ - ½ cup reduced fat shredded cheddar cheese
1 egg, lightly beaten
¼ tsp. salt
¼ tsp. black pepper
½ - 1 tsp. crushed red pepper flakes

For the Sauce:
1 15 oz. can, no salt added tomato sauce
1 package hot and spicy taco seasoning (Old El Paso)
¼ - ½ tsp. cumin

For the Pizza:
½ cup fat free refried beans
1 cup reduced fat shredded cheddar cheese, divided
Grilled chicken pieces (You don’t have to, but I seasoned mine with a little chili powder, cumin, and cayenne pepper)
Prepared sauce

Optional Toppings:
Black Olives
Green Onions
Red or Green Bell Peppers
Tomatoes

Directions:
For the Crust:
Place a rack in the middle of the oven and preheat it to 450 degrees.  Line a baking sheet with parchment paper, drizzle on and spread out a little olive oil, and then set aside.

Rice the cauliflower florets in a food processor, make sure to not puree it.  If you are unsure how this is done, follow this link for a video.  Once the cauliflower has been riced, transfer to a microwave safe dish and microwave on high for about 8 minutes, or until cooked.  Once done, you will need to drain all the excess water out of the cauliflower.  I did this by placing paper towel in a colander, dumping in the cauliflower, and pressing down.  Be careful though, because the cauliflower is very hot.  I ended up going through quite a few pieces of paper towel, due to the fact that it’s very important to get out all the water, otherwise your crust is going to be soggy instead of crispy.  And let’s be honest…..who likes a soggy pizza crust?

After the cauliflower has been drained of all the water and appears dry, place it in a bowl.  Add in the egg, cheese, salt, pepper, and crushed red pepper.  Mix well.  I used my clean hands to just knead it all together and it worked well.  Once it’s been combined, break the “dough” into two pieces and work it into small round circles on the prepared baking sheet, by pressing it down, and shaping it with your hands.  After my pizza crust was shaped and ready, I ended up placing a paper towel over the top of each prepared circle, just to absorb some of the extra liquid.  After that, place the pan in the oven for exactly 10 minutes.


While the pizza is cooking, prepare the sauce.

For the Sauce:
In a microwave safe bowl, pour in the can of tomato sauce.  After that, add in the packet of taco seasoning and the cumin; then stir around until combined.  Microwave the sauce until just warm to the touch.  This should take 45 seconds to a minute.  Set aside. (You will definitely have leftover sauce, but it’s great to dip things in, and you can store it in the fridge)

Hint:  You might want to warm up the refried beans as well, to make them easier to spread.

To Assemble:
Once the 10 minutes is up and the crust is done, remove the pan from the oven. 


Now, spread on some of the refried beans (if you don’t use them all, it’s ok).  After that, top the beans with some of the sauce, followed by pieces of chicken and then the cheese.  Feel free to add on any additional toppings as well, after all, it’s your pizza.  Once the pizza(s) are assembled, place the pan back into the oven and let cook for an additional 10-12 minutes, or until the cheese is melted to your liking.

Remove the pan from the oven and let cool for about 5 minutes.  After that, transfer the pizza(s) to a plate and enjoy!

Source: Crust adapted from The Iron You

Tuesday, November 26, 2013

Stromboli


Yesterday I shared a delicious recipe for a whole wheat pizza dough, and said that I'd be telling you what I used it for.  So, as promised, here it is......

Very rarely, if ever, do we order a pizza in this household.  I honestly can't even tell you the last time that I ate pizza, which is funny, because it used to be my favorite food.  Usually it's something special that Jeff will get when/if I'm out of town, but even then, he doesn't seem to order it too much anymore.  That's why, every so often, I like to do something special, and make him a homemade pizza, or Italian type meal.

This time around, I decided to make Stromboli instead of a traditional pizza.  For those of you who don't know, Stromboli is pretty much the same thing, but the toppings are encased in the crust.  To me, this is way tastier than a regular pizza because the crust just so happens to be my favorite part anyway.  I can remember, while growing up, my parents would order themselves a pizza every Sunday night (it was their tradition) and I would always ask my mom if she would please cut off her crust and give it to me, which she did.  Thanks mom!  Sadly though, times have changed, and this particular meal was not for me to enjoy.

There's one more thing I'd like to say before I get to the recipe and that is, the great thing about pizza and Stromboli is you can incorporate whatever ingredients you'd like.  This time around, I chose to make a meatlovers Stromboli for Jeff, but you could always add in vegetables or anything else that sounds delicious to you!

Stromboli
Printer-Friendly Version

Ingredients:
Pizza dough
Genoa Salami
Ham
Pepperoni
Mozzarella cheese
Provolone cheese
Olive oil
Egg yolk
Garlic powder

Directions:
Preheat oven to 400 degrees.

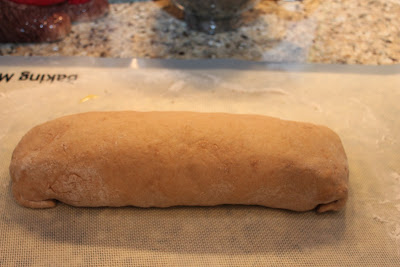
On a flat, well-floured surface, roll out the pizza dough into the shape of a rectangle.  Make sure that it is large enough so that you may add in your meats and cheeses.  Once the dough is ready, place on the meat layers, in whatever order you’d like, just make sure to leave about 2 inches on each side.  After the meat has been added, layer on the cheeses.  (I have the tendency to stuff mine too full and it makes it difficult to roll up, but is so yummy looking)
 
 
Now, add a little bit of water to your egg yolk and whisk together.  Brush the egg mixture along the edges of the dough.  This will help the dough stick together when you roll it. 

It’s now time…..

Starting on one of the long sides of the dough, begin to slowly roll, making sure to tuck in the ingredients as needed.  Once the dough is rolled up, pinch it together to seal the ingredients in and tuck/fold under the edges.
 
 
Place the now prepared Stromboli, seam side down, onto a baking sheet.  Cover the dough with a thin layer of olive oil and sprinkle on some garlic powder.  You could also sprinkle one some parsley or oregano for a little extra flavor.  Place the prepared Stromboli into the oven for 20-25 minutes.

When done baking, remove the pan from the oven and let cool for about 5 minutes.  Cut the Stromboli and serve with a side of marinara sauce.


Tuesday, September 3, 2013

Meat-Lover's White Pizza Casserole


I originally thought up this recipe back in July, when I was heading to Michigan for a couple of weeks to visit with family and friends.  Jeff was staying here, in North Carolina, all by himself for a few days, and I wanted to make sure that he didn't go hungry.  Now I know that my husband is completely capable of fending for himself, but chips and cheese for every meal doesn't count. Once again I'm just joking.....Jeff can honestly cook, and follow a recipe quite well, but we both know that his meals are pretty basic compared to mine, and that I'm the more creative one at, least in the kitchen. 

However, his particular recipe was inspired by Jeff's liking of different types of meat on his pizza.  I've made it a few times since then, and haven't altered a thing.

Meat-Lover’s White Pizza Casserole
Printer-Friendly Version

Ingredients:
13 oz. bowtie pasta (cooked according to package directions)
1 ½ - 2 lbs. chicken breast, cubed
1 cup ham, cubed (I cut up thick Canadian bacon slices)
¼ cup (or more) pepperoni, cut into 4 triangles
1 (3 oz.) package bacon bits
2 cloves garlic
1 small onion, chopped
20 oz. Alfredo sauce (I used Classico Light Creamy Alfredo)
1-2 TBSP. ranch dressing
12 oz. Italian blend cheese
Dash of red pepper flakes (optional)


Directions:
Preheat oven to 375 degrees and spray a 9x13 inch baking dish with a non-stick cooking spray; set aside

In a large skillet, lightly sprayed with PAM, or another non-stick cooking spray, (and set over a medium heat) place the chicken and cook until no longer pink and the juices run clear.  When the chicken is halfway through cooking, add in the garlic and chopped onion.

Once ready, add the cubed ham and pepperoni to the skillet and stir around for around 1 minute, or just long enough to warm up the meat.  Next, add in the Alfredo sauce, ranch dressing, 2 oz. of the cheese and the dash of red pepper flakes.  Stir everything around until the meat is well coated and allow the mixture to simmer until the sauce is heated through and the cheese is melted.

Place the bowtie pasta in the skillet with the meat and sauce and toss to combine.  Once everything is well coated, pour into the prepared 9x13” baking dish and evenly top with the remaining cheese.  Evenly sprinkle the bacon bits over the cheese and place into the oven for 10-15 minutes, or until the cheese reaches its’ desired consistency.  Remove the dish from the oven and let cool for about 5 minutes. 

If desired, garnish with more Parmesan cheese or red pepper flakes.


Tuesday, July 23, 2013

Pizza Nacho Skillet


I think the name of this recipe pretty much speaks for itself.

Pizza + Nachos = Delicious!
(Because let's be honest......who doesn't love both!)

The best thing about this particular recipe too, is that you can add or subtract any of the ingredients listed, in order to customize the meal, really making it your own!

Enjoy!

(Consider these directions and ingredients list more like 'guidelines')
Pizza Nacho Skillet
Printer-Friendly Version

Ingredients:
Tortilla chips (your preferred brand, and desired amount)
1 to 1 ½ chicken breasts, cubed or shredded (I season mine with a little chili powder and cumin while cooking)
Pepperoni, cut into pieces
Ham, cubed
Tostitos Monterrey Jack Queso
1 package Mexican cheese blend
1 jalapeno pepper, sliced
Franks Red Hot sauce

Directions:
Preheat oven to 400 degrees.

In the bottom of a cast iron skillet place a layer of tortilla chips.  Top with some of the Tostitos Monterrey Jack Queso, ½ of the chicken, ham, and pepperoni, desired amount of cheese, and a little Frank’s Red Hot Sauce.  Add on another layer of tortilla chips, and repeat toppings.  Garnish the pizza nachos with some jalapeno slices and place the skillet in the oven for 5-10 minutes, or until the cheese is melted.

Additional toppings might include: black olives, green peppers, sausage, tomatoes, onion, bacon bits, etc.

Source: Inspired by Tasty Kitchen

Sunday, June 30, 2013

Buffalo Chicken Pizza with a Beer Bread Crust


I'd like to start this post by stating that this meal was not for me.  For one thing, I've been eating pretty healthy lately, and for another, I don't typically eat pizza.  Yes, you read that correctly, I don't typically eat pizza, especially if it comes from a restaurant.  I do however have to admit that there are a few "healthy" pizza recipes that I've been wanting to make from scratch.

I was very tempted to taste test this pizza though, seeing how much I love buffalo chicken!  I'm proud to say, and still can't believe that I refrained and let Jeff have it all to himself. 

Buffalo Chicken Pizza with a Beer Bread Crust
Printer-Friendly Version

Ingredients:
For the Crust:
2 cups all-purpose flour
1 TBSP. sugar
1 package active dry yeast
1 tsp. baking powder
1 tsp. salt
¾ cup larger beer, warmed to 105 degrees
2 TBSP. olive oil

For the Pizza:
¼ cup buffalo wing sauce (favorite brand)
3 TBSP. Franks Red Hot Sauce (optional)
2 TBSP. Larger beer
1 TBSP. butter, melted
1 TBSP. ranch dressing
1 ½ cups cooked, cubed or shredded chicken (I seasoned mine with a dash of cayenne pepper and garlic powder as it cooked)
1 cup shredded mozzarella cheese
1 cup shredded provolone cheese
1 cup shredded cheddar cheese
¼ cup blue cheese crumbles (if desired)
2 TBSP. sliced green onions for garnish
Blue cheese crumbles for garnish

Directions:
For the Crust:
In the bowl of an electric mixer, fitted with the paddle attachment, but removed from the stand, combine 1 cup of the flour with the sugar, yeast, baking powder, and salt.  Now, add in the beer and olive oil and stir together.  Place the bowl back on the stand, and beat on a low speed for about 30 seconds, then on high for about a minute.  Add in the last cup of flour and continue to beat on low, until a soft dough is formed.

Replace the paddle attachment with a dough hook (If you don’t have a hook, you could knead the dough by hand) and beat on a medium speed for about 5 minutes.  (The dough should feel somewhat tacky, you can always add more flour, if needed)

Once the dough is ready, cover and let rest for 30 minutes.
 
 
For the Pizza:
Preheat oven to 450 degrees and spray a baking sheet with a non-stick cooking spray. 

On the prepared baking sheet, press the dough into a 14x10 inch rectangle and poke holes in it using a fork.  Bake for 8-10 minutes, or until the edges of the crust just begin to turn a nice golden brown.

In a medium bowl, whisk together the wing sauce, hot sauce, beer, ranch dressing and melted butter.  Add the chicken, and stir around until all the chicken pieces are well coated.

In a small bowl, combine all 3 cheeses and stir together until well blended. 

Once the crust has been removed from the oven, sprinkle on about 1 cup or so of the cheese mixture (I used a little extra).  Top with the chicken and sauce mixture and then add on the rest of the cheese.  Return the pizza to the oven and bake for another 8-10 minutes, or until the cheese is melted and the crust is a nice golden brown.  Remove from the oven and garnish with green onions or blue cheese crumbles.
 
 
Source: Slightly adapted from Betty Crocker

Wednesday, June 13, 2012

Roasted Garlic with Chicken and Pesto Pizza


I've recently discovered that my local grocery store (Harris Teeter) happens to have the absolute best Basil Pesto Sauce!

Ever since I first tasted it I was hooked and have been searching for ways to try to incorporate it into a meal.  Putting the sauce into a pasta dish of some sort was my original plan, but then I happened to come across this recipe, for pizza, that happened to use a pesto sauce for a base.  I immediately became excited and went out to purchase the other ingredients I would need, (which honestly wasn't much) and then I set to work.

The pizza itself did not take very long to throw together and the end result was even better than I'd hoped for!

Roasted Garlic with Chicken and Pesto Pizza
Printer-FriendlyVersion

Ingredients:
1 pizza crust (store bought or homemade, I didn’t have time for homemade, so I used Boboli 12” Whole Wheat Thin Pizza Crust)
¾ - ½ cup prepared pesto sauce
1 bulb of garlic
1 tsp. olive oil
1 boneless, skinless chicken breast, cooked (use some olive oil when cooking) and shredded
Mozzarella cheese
Parmesan cheese

Directions:
To roast the garlic:
Preheat oven to 375 degrees.

Gently peel off the outer shell of the garlic bulb, leaving the skin directly around the individual cloves intact.  Now, using a sharp knife, cut about ½ an inch off the top of the garlic bulb, exposing the inside of the cloves. 


Drizzle the top of the exposed cloves with a little olive oil and then wrap the garlic bulb in aluminum foil. 


Once ready, place onto a baking sheet and let the garlic cook for around 35-40 minutes, or until the cloves feel soft.  Remove the pan from the oven and allow to cool for a minute or so before trying to unwrap the garlic bulb.  Next, using a small bowl, gently squeeze the individual cloves from their skin and mash together with a fork or a spoon. 


This should form a paste like substance. Set aside.


For the pizza:
Preheat oven to 400 degrees.  (If using a pizza stone, preheat this along with the oven)

Using a knife or the back of a spoon, spread the roasted garlic paste over the pizza crust (please feel free to spread on as much or as little as you like; I seem to enjoy the garlicky taste so I put on the whole bowl).  Next, evenly spread around the prepared pesto sauce. 


Top the sauce with the shredded chicken pieces (I find the chicken easiest to spread around if you use your hands). 


After that, add on the mozzarella and parmesan cheeses (once again, you can add on as much or as little as you like). 


If using a regular pizza pan, place in the oven and bake for 8-12 minutes.  If using a pizza stone, place the crust on parchment paper and then transfer it to the stone.  I always like to turn the oven onto broil for the last minute or so of cooking in order to give the cheese that nice golden brown tint (If you do this though, keep a careful eye on the pizza because it can burn quickly). 

No matter how great the pizza smells when it's done, wait a few minutes before cutting!  Enjoy!


Source: Sugar Cooking

Thursday, May 31, 2012

Mexican Pizza


How can anyone go wrong with homemade pizza?  In my opinion it's absolutely the best!  Homemade pizza not only contains fresher ingredients than a franchise pizza does, but you're also able to control the amount of toppings that are added to it.  Ultimately, this helps make the pizza as healthy, or as unhealthy, as you desire.

Knowing me, I've been going for healthy dinners lately and this particular pizza recipe, which was slightly adapted from Emily Bites, is surprisingly healthy.  I use the word surprisingly, because of how tasty it is.  The pizza itself consists of almost entirely low fat ingredients, and is also baked on a whole wheat crust. You just can't go wrong with this recipe because it is both healthy and delicious!

Mexican Pizza
Printer-FriendlyVersion

Ingredients:
1 lb. 99% fat free ground turkey, or lean ground beef
1 packet reduced sodium taco seasoning
1 tsp. cumin (optional, it will just give it a little extra kick)
1 ½ tsp. chili powder (optional)
Boboli 12” Whole Wheat Thin Pizza Crust
½ cup of your favorite salsa
2 Tbsp. taco sauce
½ a can of fat free refried beans
1 cup cheddar cheese

Garnish Options:
Lettuce
Scallions
Black olives
Black Beans
Guacamole

Directions:

Preheat oven to 450 degrees.  If using a pizza stone to bake on, make sure that it preheats with oven.

In a large skillet over a medium-high heat, brown the turkey, or the beef.  Make sure to break the meat into pieces as it cooks, and drain the excess fat.  Next, return the turkey or beef to the skillet and add in the taco seasoning, and cook according to package directions.  During this time you should also stir in the cumin and chili powder, if using.  Allow to the mixture to simmer, and then set aside.

In a small bowl, combine the salsa and taco sauce.  Stir together.

To assemble:
Spread an even layer of the refried beans over the top of the pizza crust.  Next, add on the salsa/taco sauce mixture, all while making sure to leave about a ½ inch edge around the crust.  Evenly spread on the seasoned turkey/beef.  Top the pizza with the cheddar cheese.  (Feel free to add more cheese if you like and are not worried about calories)  This would also be a good time to add on some of the garnish options such as the black beans, or olives.  I would hold off on the other options though until the pizza is done baking.  This will keep them from becoming soggy.

Once ready, place the pizza on a pan or on a pizza stone and place in the oven and for 8-10 minutes.  Remove the pizza from the oven and top with lettuce and scallions.  Cut into slices and serve warm. 

This pizza is also great reheated!

Source: Adapted from Emily Bites